|
How to create a high end looking burl wood furniture finish on a plain dresser by doing this IKEA dresser hack using contact paper for just $30. Last week, we started another Bless’er House Takeover room makeover project in a shared bedroom for 3 pre-teen girls at our neighbors’ house. (It’s turning out SO cute!) The “vision” I’ve had for this room is beachy, vintage, refined but a little bit rustic. And then, for some reason, a burl wood dresser popped into my head. So I figured why not take a stab at an IKEA dresser hack to pull off the look for about $2,000 less than the real deal burl wood dresser version. 
Doesn’t it look vintage?! It only cost about $30 in contact paper and 1 hour to pull off the look! 
IKEA Hack Ideas Using Contact PaperI used an IKEA Hemnes chest dresser for this hack but really any dresser with flat drawer fronts could work. Furniture pieces from the IKEA MALM line would work well too. If you wanted to go beyond dressers, you could even try this burl wood contact paper hack on a flat front door for an IKEA PAX wardrobe, an IKEA LACK side table, or an IKEA BESTA storage cabinet. Because all of these styles are sleek and simple with clean lines, they are super versatile for contact paper applications. (See how I used marble contact paper on this IKEA coffee table.) There are so many plain, low budget pieces out there that you could try this burl wood furniture look on even secondhand on Facebook Marketplace. DIY Burl Wood IKEA Dresser HackSupplies
You’d never guess this look happened using contact adhesive paper, would you? 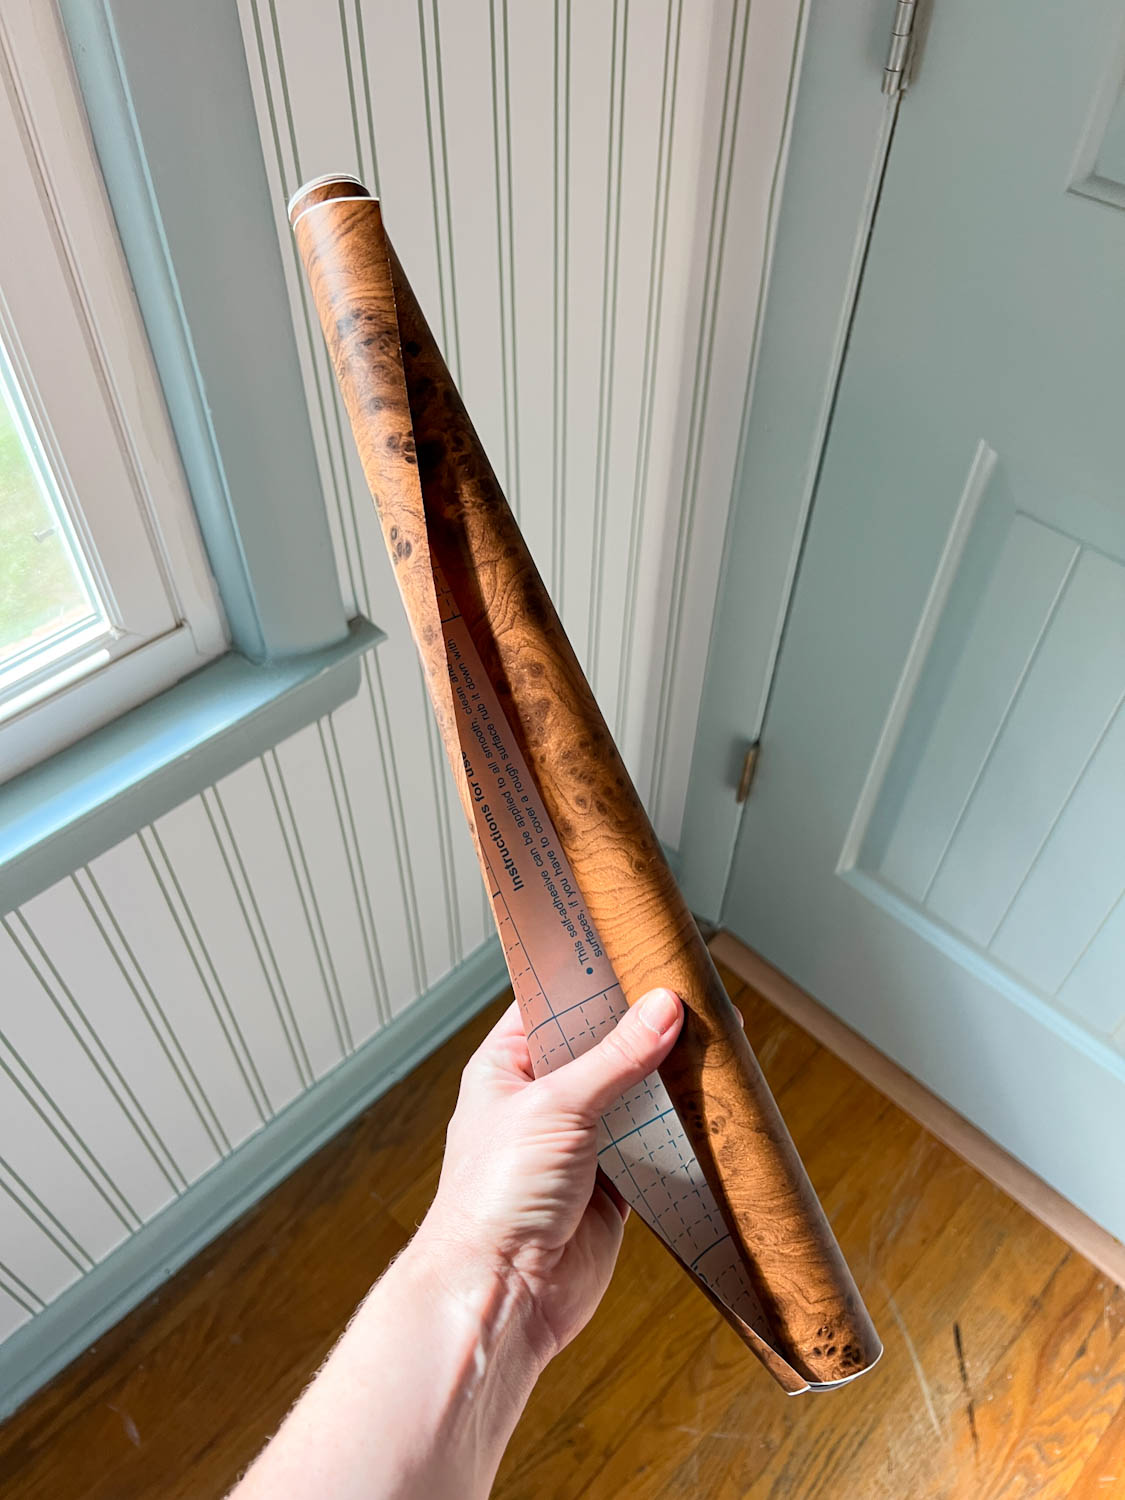
StepsStep 1 – Place Drawer Front on Contact PaperUnroll the burl wood contact paper and cut a portion off of the roll to fit one drawer front with an inch or two of excess to spare. Place the drawer front face down on the contact paper and mark about 1-2 inches outside of the perimeter of the drawer front with a pencil. 
Step 2 – Trim Contact PaperUsing scissors, trim the contact paper where you marked so you have 1-2 inches of excess paper to wrap around the drawer’s sides. 
Step 3 – Align and Place Burl Wood Contact Paper on Dresser Drawer FrontPeel away 3-4 inches of the paper backing on the sticky contact paper. Fold down the paper backing. Then, turn it over, align the contact paper strip on the drawer front, and begin peeling away the paper backing. 
Step 4 – Press Out Air BubblesContinue to slowly peel away the paper backing as you stick the contact paper to the drawer front, pressing in a scraping motion with the wallpaper smoothing tool (I just used an old gift card because I forgot mine but it worked fine). Press out any air bubbles with your smoothing tool until the contact paper is fully adhered to the drawer front. 
Step 5 – Cut Corner SlitsAfter smoothing the contact paper to the front, you’ll have about an inch or two of excess around the sides. At each corner of the drawer front, cut a small slit (pictured below). This will create flaps. 
Step 6 – Smooth Down 1 Side FlapSmooth down a flap on one side (almost like gift wrapping a present). 
Step 7 – Tuck the Cut Corner Around the Adjacent SideTake the little flap at the corner and tuck it underneath the flap on the adjacent side of the drawer front. (Repeat Steps 5 and 6 on the opposite side of the drawer.) 
Step 8 – Smooth Down Remaining SidesSmooth down the top and bottom flaps of the drawer front so they cover the flaps from Steps 5-7. 
Step 9 – Add Knobs or PullsIf you want to jazz up the dresser a little more, add unique knobs or drill new holes for pulls. I love these gold and glass knobs that added a slightly feminine touch. See more great places to find furniture hardware here. 
Project Cost BreakdownVoila! The entire IKEA dresser hack for the piece of furniture, contact paper, and knobs all together came to $405. Not too shabby considering my high end dresser inspiration cost $2,495! I added this cute, slightly beachy table lamp, rattan mirror, picture frame, and plant to bring it all to life in this bedroom. Now this plain dresser has a vintage, art deco feel to it. Contact Paper Style Options for Easy IKEA HacksIf the burl wood furniture look isn’t your thing though, you could still try a bunch of other styles of contact paper for furniture. Were you here for this white marble contact paper coffee table hack years ago? 
Contact Paper for FurnitureThese are some of my favorite contact paper styles to make plain, inexpensive furniture look custom and high end.

Honestly, I want to try this burl paper on a piece of furniture in our house now. I can’t get over how real it looks! (You can see more furniture makeover ideas here.) This space is looking so beautiful! I can’t wait to share the final reveal soon More IKEA Hack Ideas

The post DIY Burl Wood IKEA Dresser Hack Using Contact Paper appeared first on Bless'er House. Originally from Bless'er House https://ift.tt/6MkLqYf
0 Comments
Leave a Reply. |
