|
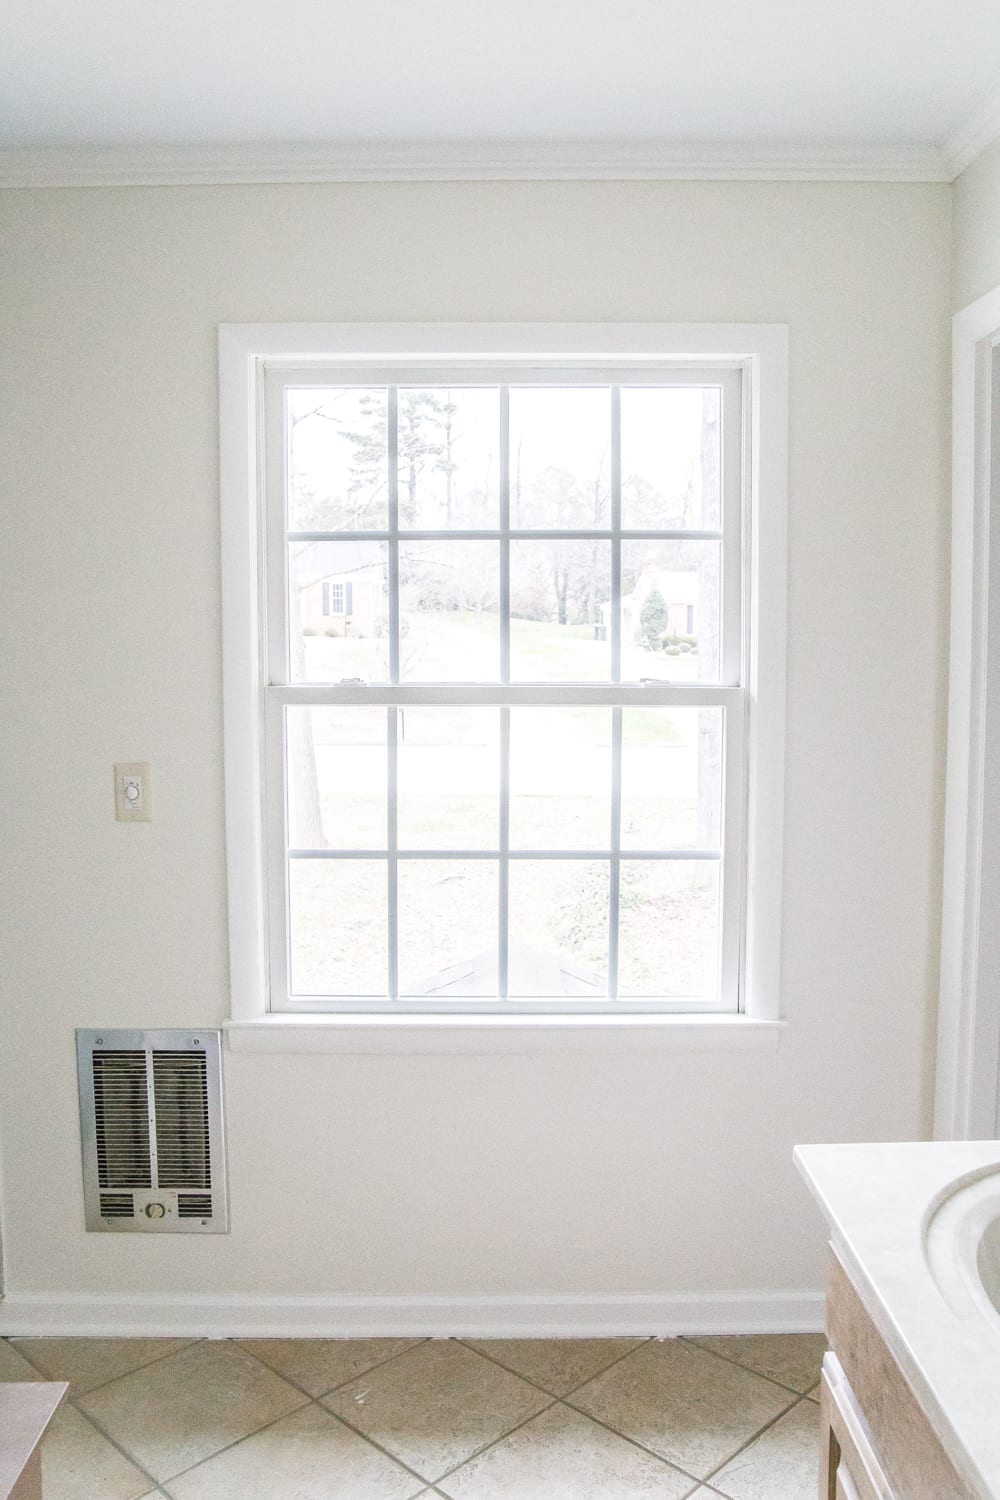
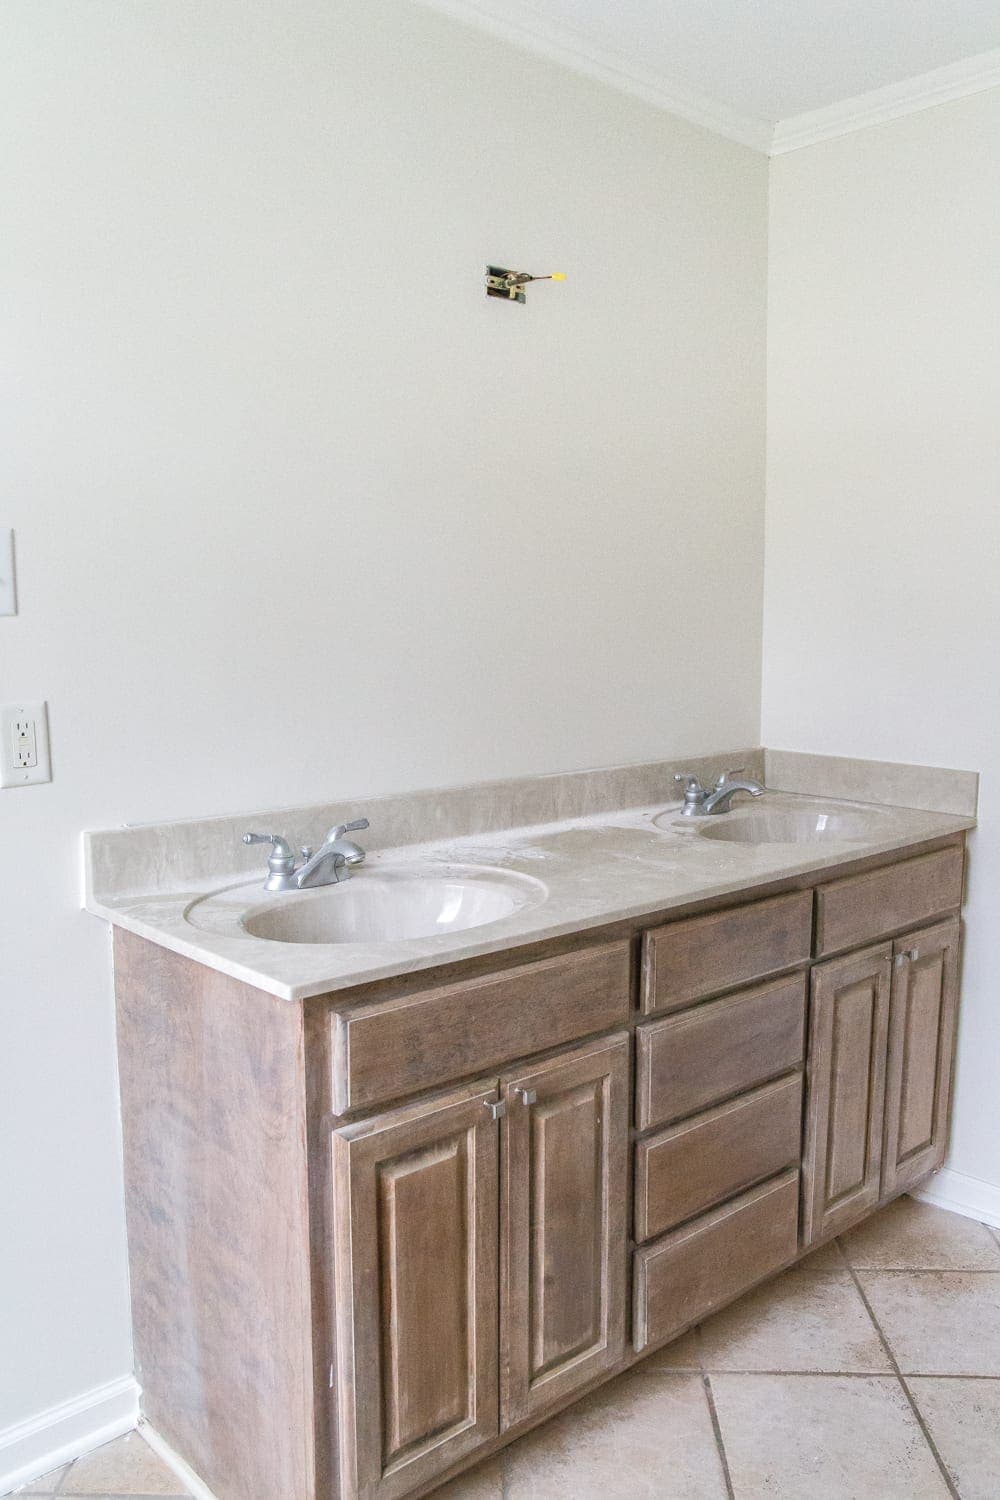
This post is sponsored by The Home Depot. My love language is organizing and decluttering. That’s what I figured out last weekend. The house was a total wreck, mostly because with the master bathroom refresh happening, all of the other rooms sort of spun out of control (funny how that always seems to happen during intensive room makeovering). Robert could tell I was feeling stressed Saturday morning and said to me, “You just enjoy some alone time”, and took the girls to Grandma’s house across town. (Sigh… that knight in shining armor.) And do you know what I did in those 7 glorious hours while they were gone? I organized. And it was LIFE GIVING! Which got me to the storage/organization situation in the master bathroom… because we have none. Zilch. This was the storage situation in our master bathroom a few weeks ago:
That sad little hamper was barely helping. And I knew we could get so much more function out of that spot with vertical storage.
So we sprung for this Home Decorators Collection linen cabinet from The Home Depot to help with storing our towels and toiletries that usually ended up cluttering our countertop in the past. They have so much great storage furniture along with linens and pretty baskets and organizing solutions. We conveniently picked up this cabinet during a big sale, so we couldn’t have even built it for the time and building materials and paint it would have taken for the sturdy quality of it. It shipped to our house for free in two days (all orders over $45 ship free), and it was already assembled. Woo to the hoo on that one!
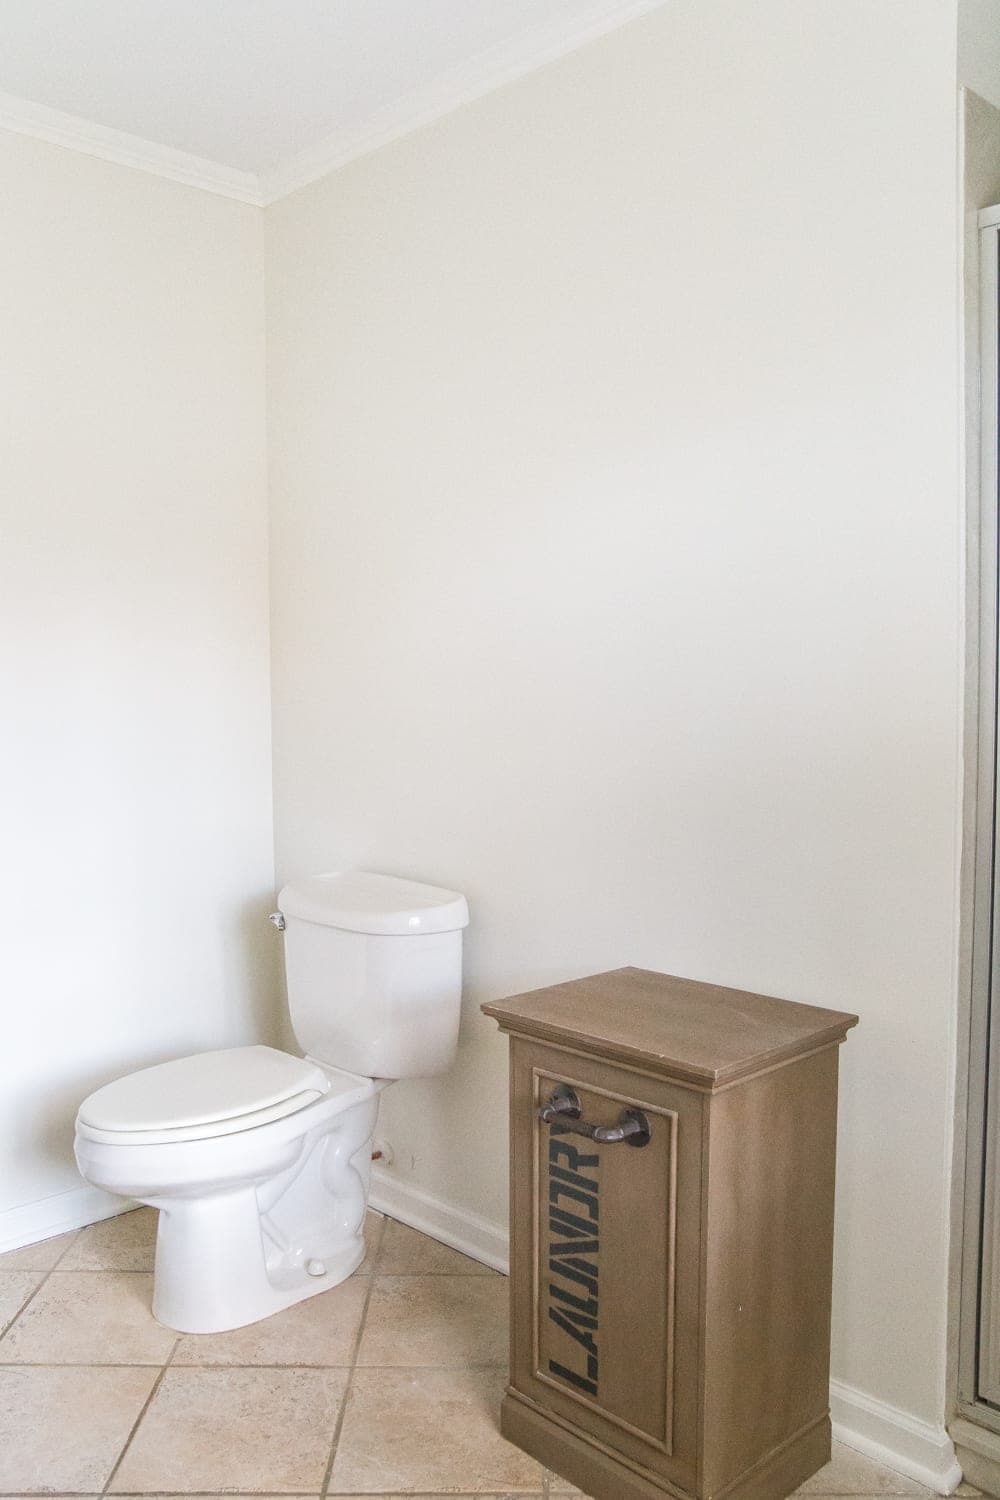
But the thing that drove me crazy was we needed a hamper too, and we had no more space for one in our tiny bathroom. I was determined to get this linen cabinet though because I loved the color so much that it inspired the paint job on our vanity cabinet. I figured I could rig a hamper instead. And it worked! If you have a cabinet that would work better moonlighting as a hamper, here’s how to do it. This is seriously the most simple tutorial ever and barely needs an explanation. I’m dubbing it the “instant hamper trick”. Supplies Used:
That’s it. I know, this hardly constitutes as a DIY.
The Steps:1. Drill pilot holes into both sides and back of your cabinet, near the top. 2. Screw your 3 small coat hooks into the pilot holes. 3. Hang your laundry bag open from the 3 hooks by poking them through the open mesh netting underneath the drawstring.
Boom. You have a hamper.
It’s hilarious to me how absolutely ecstatic I got over this, but hey… this mama needed functional storage to help with the daily cleaning up and she got it!
For the rest of the linen cabinet, I just rolled up our towels to store on one of the shelves, and I rolled up our washcloths to store in the drawer.
I picked up a couple of canisters from The Home Depot to hold our bath sponges and cotton balls, and I stuck a basket on top for holding toiletries.
And I put this philodendron plant on top to add some life to the room. Can you believe it’s artificial? It looks so real!
To help with the toilet paper storage situation, I picked up this big basket too. I love how it added a bit of extra texture… even if it’s filled with very unexciting TP. Decor sources:
//
!function(d,s,id){
var e, p = /^http:/.test(d.location) ? 'http' : 'https';
if(!d.getElementById(id)) {
e = d.createElement(s);
e.id = id;
e.src = p + '://widgets.rewardstyle.com/js/shopthepost.js';
d.body.appendChild(e);
}
if(typeof window.__stp === 'object') if(d.readyState === 'complete') {
window.__stp.init();
}
}(document, 'script', 'shopthepost-script');
//
 Turn on your JavaScript to view content Turn on your JavaScript to view content
I’m so thrilled to see this bathroom nearing the end and to finally get some function in here! Makes me think we should have worked on this room ages ago. If you’re needing some pretty bathroom storage solutions, you can check out all of them at The Home Depot here. What do you think of that instant hamper trick?! Is this something everyone already figured out except me? Sometimes the best solutions are the most simple ones.
The post How to Turn a Cabinet Into a Hamper in Seconds appeared first on Bless'er House. Originally from Bless'er House http://bit.ly/2G0ggyB
0 Comments
It’s the freakin’ weekend, y’all! I’m doing something rather out of the ordinary today by swapping out my paint brush for my coffee cup to gush over decorating ideas and introduce y’all to a group of sweet blogger friends. (Well, okay, this weekend won’t be totally project-less… you guys know me better than that.) Every Saturday these ladies host a blog hop called Home Style Saturdays with all kinds of helpful decorating projects and advice, and I’m so thrilled to co-host with them this week. And if you missed it yesterday, I shared a post I’ve been meaning to write forever! If you’ve been struggling with figuring out your decorating style, I hope this one helps get you on the right track.
Bless’er House | How to Find Your Decorating Style
Shabbyfufu | Budget Bathroom Ideas – Luxury Hotel Look
So Much Better With Age | Valentine’s Day High Tea Party
StoneGable | DIY Pine Cone Fire Starters
Designthusiasm | 5 Affordable Room Makeovers: How to Update Your Decor
On Sutton Place | DIY Heart Wreath Ideas
I hope you love these five ladies as much as I do. I looked up to all of their beautiful blogs and homes so much before I ever started blogging myself. Now if y’all need me, I’ll be over here painting a door, hanging up some new printable art, and planning something HUGE that I’m dying to tell more about next week. Are you up to anything creative today? Or still KonMari-ing? (Is that a verb? It is now.) Cheers to Saturday, friends!
The post Home Style Saturday appeared first on Bless'er House. Originally from Bless'er House http://bit.ly/2G1q2Q2 6 steps to find your decorating style by examining your personality, your lifestyle, your inspirations, and what you already own to create the home you love. #decoratingstyle #findyourdecoratingstyleConfession: I don’t have a clue what I’m doing. I don’t have any sort of formal interior design training. If you ask me what my decorating style is, I’ll shrug and say, “I really don’t know.” But I do know one thing. I know what is “me”. And somehow that works. This is honestly a hilarious post for me to write because 5 years ago, I felt so lost sifting through my overflowing Pinterest boards as Robert and I were about to move into our first house. Wouldn’t you feel overwhelmed too in this big blank slate?
I had boho and farmhouse and glam and industrial and every kind of decorating style you could imagine crammed into my little room planning folders. And. I. was. so. overwhelmed! I wasted so much money doing the trial and error thing for a while buying things that weren’t “me” because I didn’t take the time to really decide what my style actually was. Is this familiar to you? Have you gone through the identity crisis thing? If not, click that little “x” in the corner because this post isn’t for you. If you have, settle in, friend, because I feel ya, and I hope this helps in some way so that you don’t keep making the same mistakes over and over.
Out of all of the thrift projects I’ve done, furniture makeovers I’ve finished, room redesigns we’ve pulled off, the best money-saving advice I can ever give you is this: If you don’t figure out your decorating style first, you will never be totally happy with your home, and you will waste so much time and money trying to work backwards. Okay, whew! That was long-winded, but I had to tell you that because I eventually had to tell myself the same thing. Want to know how to break out of that though? Here we go… How to Find Your Decorating Style:1. Look for commonalities among your inspiration photos.When I first tried to figure out my style, I looked through my home inspiration Pinterest boards to try and decipher traits many of them had in common.
And I discovered most of the photos had these:
Boom! That was me in a nutshell. And I’m betting, if your Pinterest boards feel all over the place, that they actually have a lot of similarities that will point you in the right direction for your home’s “game plan”. 2. Check out your own wardrobe.When I looked through my closet and sifted through some of my favorite clothing pieces, I found the same thing I’d discovered in the commonalities among my inspiration photos: natural fabrics, textured details like fringe and lace, simple fabric prints (if any at all), and neutral colors with hints of blue and green mingled in.
I’m a jeans and simple T-shirt or light blouse kind of girl with casual booties or sandals. That’s my comfort zone. If you love bright colors and fun patterns and sequins and glitz, embrace that same style in your home! Because that is YOU! 3. Examine your home’s architectural style.If your house already has some character, make it shine.
If you live in a midcentury modern house, mingle in some midcentury mod furniture. If you have a more traditional home, lean traditional in maybe your light fixtures. You don’t have to totally box yourself into one type of decorating style just because your house’s already established architectural style dictates that. Just throw in a nod to it and it’ll feel like it fits. And if you have a builder grade house that is rather character-less, consider it a wild card and have fun with whatever style you want. 4. Consider your and your family’s lifestyle.We are a laid back bunch with little kids, so it makes sense for our family to have weathered tables that the kids can scuff up, slipcovered furniture that can be cleaned up in the wash, and vintage style rugs that hide stains really well.
Think about how your family functions, what your storage needs are, how you use each room in your home daily to decide what to do with it. 5. Think about what decor you already have and KonMari it.Pick up each piece of decor (candle holder, throw pillow, vase, whatever) you have in your stash, one at a time, and if it doesn’t “spark joy”, right in the donation pile it goes.
Don’t waste time and money trying to make your existing decor work (only do that, if you really do love your existing pieces). Have a yard sale or sell it on Facebook marketplace and use that money to buy decor that does spark joy for you. 6. Decide what feeling you want your home to have as soon as you walk in.When I come home, I want to feel peace and calm, so it makes sense that I stick to soothing blues and greens and accents that are more nature inspired. But maybe you want your home to feel energetic and upbeat or nostalgic with eclectic collections.
If you want more decorating guidance, you can subscribe and join the Bless’er House Budget Decorating Group. If you’ve been struggling with the style soul-searching, I hope this helped steer you a bit, at least. I’m no Martha Stewart, but finding my style was the best thing I ever did to finally get some clarity and confidence on this decorating journey. Didn’t Dolly Parton say, “Find out who you are and do it on purpose”? Find out your style on purpose while you’re at it too. To save this post for later, pin it here:
The post How to Find Your Decorating Style appeared first on Bless'er House. Originally from Bless'er House http://bit.ly/2MuQt1U A round-up shopping guide with 25 unique bathroom mirrors for less than $150 to add interest and texture.We’re still trucking along in the master bathroom refresh (meanwhile, the rest of the house looks like a train wreck… it’s always what happens when we tackle a room makeover). But last night Robert and I hung up the new arched wood-framed mirrors to replace the basic one from before and oh. my. stars. The difference is crazy!!!
If you are desperate to add some interest to your bathroom and want to ditch the ho-hum, I’m telling you, take your basic mirror off of the wall and hang up one with a unique frame or a different shape. It makes a WORLD of difference for not a whole lot of effort or expense. I’ve been asked several times from y’all how to remove a bathroom mirror from the wall. Luckily, any time we’ve ever encountered a bathroom mirror replacement, the old ones were hung up with clips. So the job was really quick. Here’s a video that can help if yours is hung up with clips. If your old bathroom mirror is hung up with adhesive though, take heart in knowing that you can still remove it! Here’s a video with a great trick to safely help you remove a mirror hung up with adhesive. Just for fun, I thought I’d round up a whole bunch of my favorite unique bathroom mirrors for a smaller budget (because there are some crazy pricey ones out there to weed through). All of them are under $150, and several of them are under $100. I hope it helps! (Some affiliate links are provided below. Full disclosure here.)
//
!function(d,s,id){
var e, p = /^http:/.test(d.location) ? 'http' : 'https';
if(!d.getElementById(id)) {
e = d.createElement(s);
e.id = id;
e.src = p + '://widgets.rewardstyle.com/js/boutique.js';
d.body.appendChild(e);
}
if(typeof window.__boutique === 'object') if(d.readyState === 'complete') {
window.__boutique.init();
}
}(document, 'script', 'boutique-script');
//
Turn on your JavaScript to view content
If you want to save this post for later, you can pin it here:
The post Unique Bathroom Mirrors for a Small Budget appeared first on Bless'er House. Originally from Bless'er House http://bit.ly/2S2Fn9E 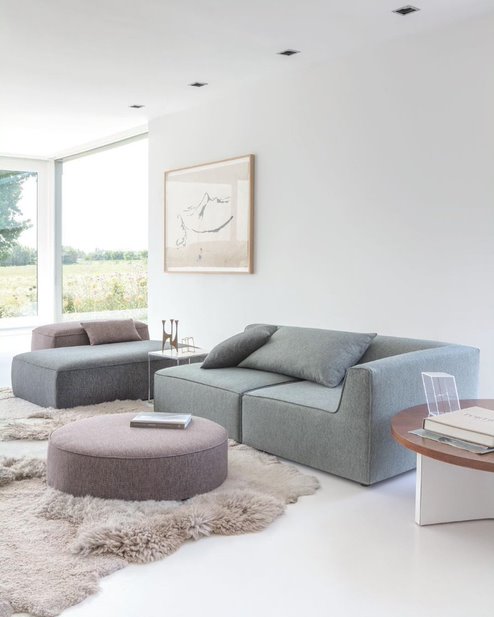 [Image source: @fibreguard Instagram] If you are someone with piece of chenille sofa, then, you are in the right place. A clean house can be challenging to maintain especially if you have young kids or pets. It is good to clean your fabrics to ensure they look great and new. If you want to clean them yourself, you must ensure caution is observed as they are very delicate. Here is a guide to clean chenille sofas. Before you commence the cleaning process, ensure you have the following materials. You will need a soft brush, bowl, mild liquid soap that is dye-free, a white microfiber cloth, hair dryer, solvent based cleaner and a vacuum and upholstery attachments. It is advised that you read the label on the chenille fabric before using any solvent-based cleaners or spot treatments. Brush the chenille fabric for sofa with a soft brush to get rid of loose dirt from the arms and cushions. Brush in the nap direction. Vacuum the sofa using the lowest settings. If possible, do this weekly to prevent dirt from embedding itself to the chenille upholstery fabric. Cleaning chenille fabric is not hard and anyone can do it with correct guidelines. As for spills, it is recommended that you spot clean the area before the damage is permanent. All of the supplies and steps you need for installing sheet vinyl flooring over old tile yourself for a temporary fix.Favorite project EVER! Okay, I say that about probably 50% of every project we do around here, but this one is definitely up there on the charts of most-transformative-for-least-amount-of-money. If you’ve been following along on our master bathroom refresh, Robert and I had painted the walls, trim, and cabinet up until this past weekend. But the ceramic tile floor still looked like this:
Even though we had rescued the ceramic tile in our kitchen and hallway bathroom using grout pen in the past, this floor seemed a little farther gone. And since we were sticking with the existing countertop and shower for now (until a real gut/renovation down the road), I wanted a floor that would modernize the 80s beige a little better. Except I wanted to steer clear of tile paint and the stenciling route like so many DIYers have been doing here lately. With a 3 month old in the house, I wasn’t loving the idea of fumes and I wanted this job to be quick and the install done in a matter of an hour or two.
Normally, if you were doing a major renovation, I would NOT suggest putting vinyl floor on top of tile. I think for a permanent floor, it should be done the “right” way. But for a quick Phase 1 fix, it’s a great DIY-able solution to carry you through until you’re ready for a messy contractor job. So if you’re wanting to do the same thing to some of your existing tile floors that have seen better days, here’s how we made it happen. (Some affiliate links are provided below for convenience. Full disclosure here.) How to Install Sheet Vinyl Flooring Over Tile:Supplies Used:
The Steps:
Try to apply it as smoothly as possible.
2. Once the mortar is dry in about 24-48 hours, you can sand any rough spots with medium grit sandpaper. 3. Sweep the floor and remove any debris with a dust pan since you don’t want to trap anything under your sheet vinyl floor.
4. Remove quarter round and baseboards with a crowbar and mallet or hammer. Here’s a post to help you with it, if you’ve never done it before. Set the quarter round trim and baseboards aside to reinstall after the sheet vinyl is in (assuming they’re in good condition).
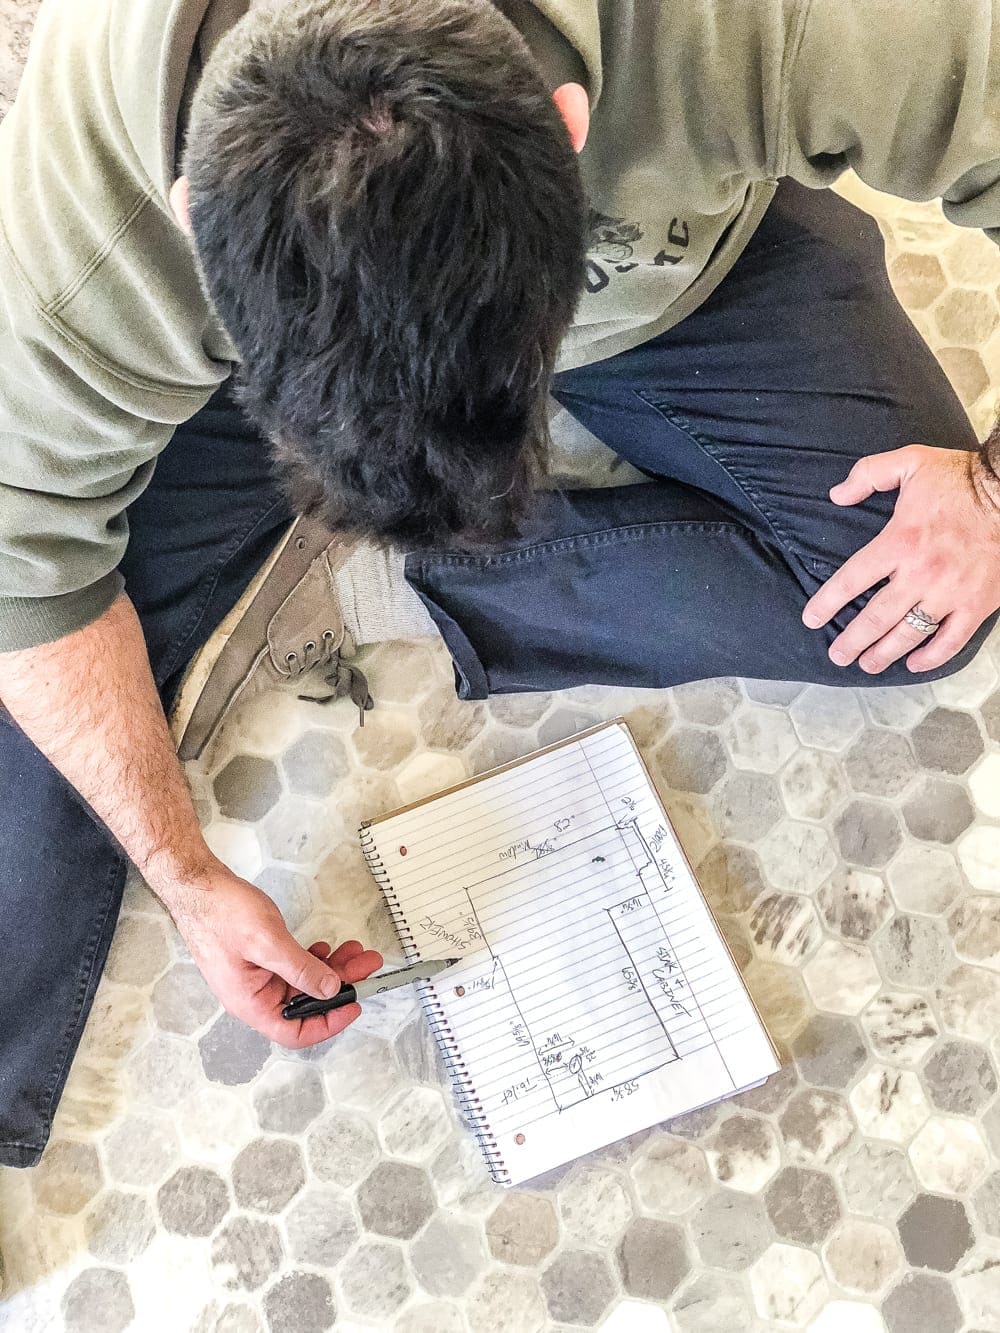
5. Measure all of the edges around the room and draw a diagram of your room on a piece of paper using those measurements. Never a dull moment with this guy around, even with mundane measuring jobs. Include measurements of any obstacles in the room as well. We removed our old toilet beforehand (this is a great video for toilet removal with a good tip to prevent water dripping everywhere), so we measured where to cut a hole in our sheet vinyl for that as well.
6. Measure twice and double check that all of your measurements are correct on your diagram.
7. Roll out your sheet vinyl and take a nap. Just kidding.
8. Use your diagram as a reference to mark your measurements using the tape measure onto the edges of the sheet vinyl to create a template.
9. Mark your lines between your measurements for the perimeter of your room with a chalk line.
10. And cut the sheet vinyl with sharp scissors or a utility knife. After your floor is cut, wipe up any remaining chalk line (Mr. Clean Magic Erasers work great).
11. Haul your cut sheet vinyl into the room and roll it out. Trim any remaining spots with a utility knife as needed as you position it into the room. 12. Reinstall your baseboards and quarter round trim with a nail gun to hold your floor’s edges in place. (This was per our manufacturer’s instructions for our specific vinyl floor, but your floor’s manufacturer may require you to apply an adhesive first.)
13. Then, apply white silicone caulk to fill cracks on the reinstalled trim. And attach sheet vinyl edging to where it meets up at a shower/tub/door threshold too.
It looks SO much better in here now! And that beige countertop almost looks intentional… almost. But with the mix of warm and cool tones in this floor, I feel like it makes the blue and beige cohesive.
So now next on the agenda is to patch, touch up a little paint, and install a new toilet (because the old one desperately needed to be hauled out for good). I’ll be painting the door Benjamin Moore Wrought Iron this week to match the rest of the ones in the house that are already that deep charcoal color.
And I’ll be hanging up a window shade so that the whole neighborhood doesn’t get a peep show when we actually are able to use this bathroom again. Ha!
And we’ll be hanging up new mirrors and installing a new vanity light this week too.
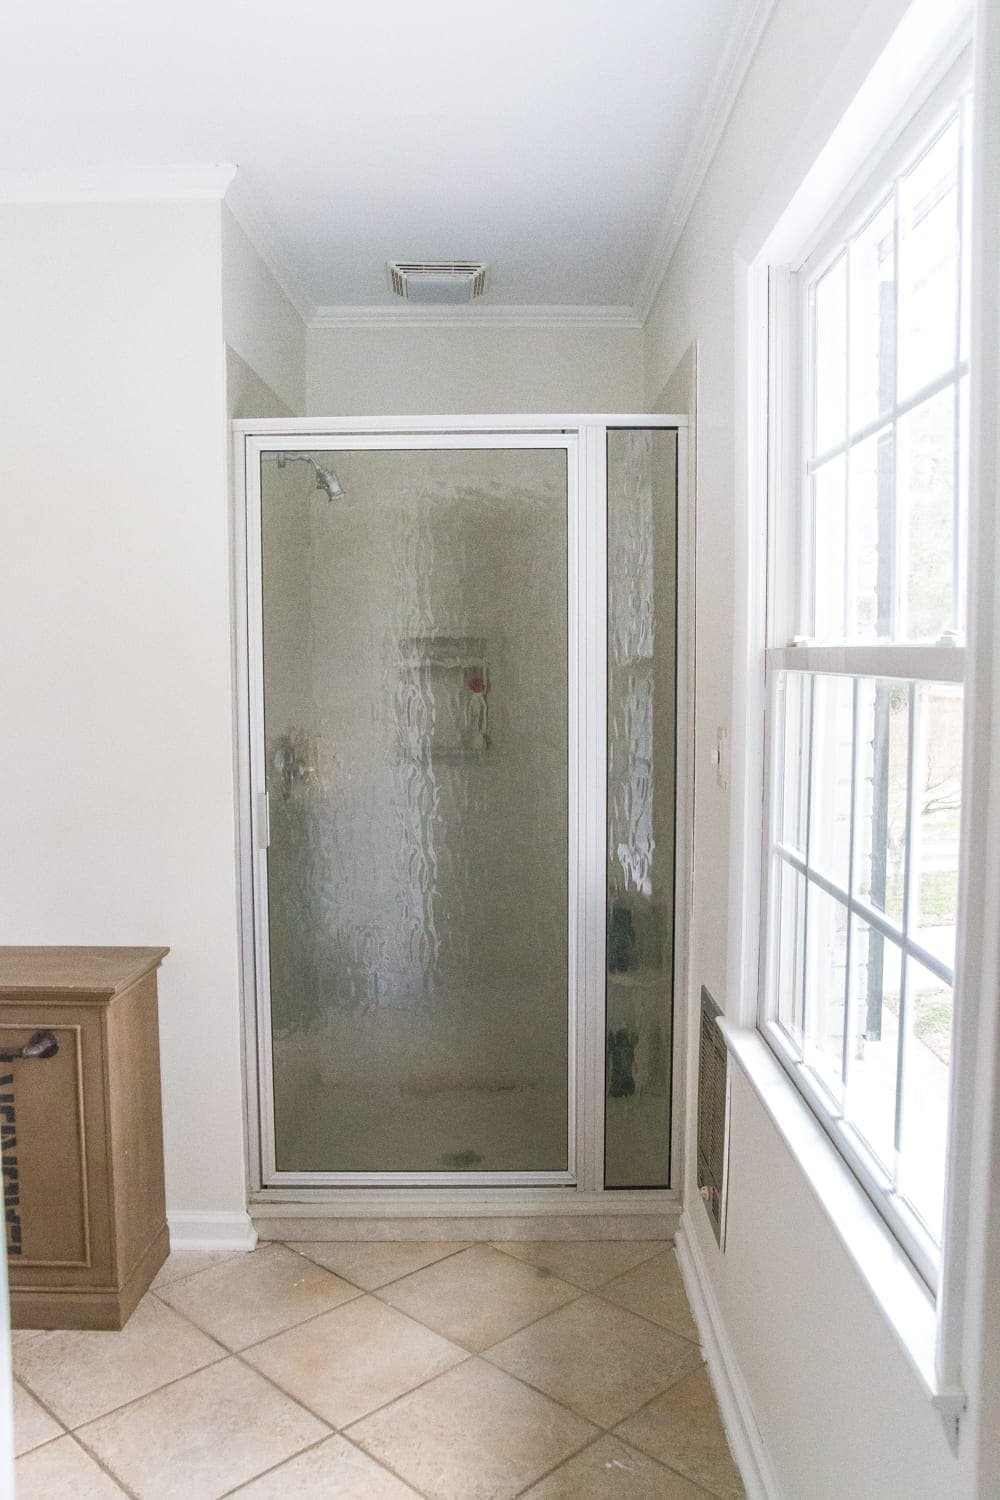
I keep debating on whether or not I should hang a long shower curtain in front of this shower door to camouflage it though. What do you think? Cover it up or leave it?
We’re finally in the home stretch over here! And then we’ll be gearing up for our first major renovation elsewhere in the house that I can’t wait to show y’all. Eek!!! One thing at a time though. If you want to save this post for later, you can pin it here:
The post How to Install Sheet Vinyl Flooring Over Tile appeared first on Bless'er House. Originally from Bless'er House http://bit.ly/2MrpdB7 |


 Cheers to a great weekend!


 I am so excited to see how it all looks once the new wooden arched mirrors, wall sconce, and vanity pulls are put in place.