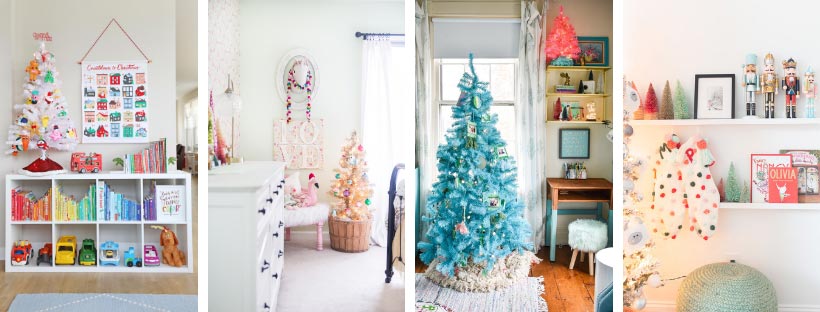
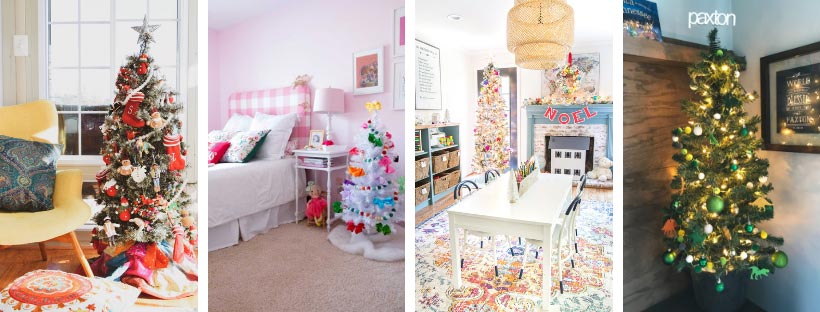
A bright and colorful playroom decorated for Christmas along with 11 more kids’ spaces lit up for the holidays.I remember clear as day one of my absolute FAVORITE things to do the day after Thanksgiving growing up was getting to decorate my very own personal Christmas tree in my bedroom every year. It was a scraggly little thing and all of 2 feet tall, but I was always so proud of that little guy. This year, we put a Christmas tree in Olivia’s playroom so that she could do the same thing (although hers is way taller than mine was back in the day). So today, a bunch of blogger mamas and I are sharing our kids’ spaces for Two Twenty One‘s Kid Christmas Tour. If you’re visiting from Charlotte’s cute blue Christmas from At Charlotte’s House, I’m so glad to have you here for a play date!
We get pretty messy around here, so feel free to get magic marker on the table and Play-Doh on the rug (seriously, don’t look too closely at it). Messy play = learning minds. We gave this playroom a full makeover earlier this year, so I couldn’t resist going all out in here so that Olivia could play and color by her twinkle lights. She draws and colors at this table every single evening after school, no matter what. It’s her happy place. This room was the original family room back when this house was built in 1960, so it still has the original fireplace that I limewashed (tutorial here). And there was no way I could leave this mantel undecorated for Christmas. (Some affiliate links are provided below for convenience. You can see my full disclosure here.)
We rustled up a bunch of Olivia’s handmade ornaments from her preschool days and mixed them in with some bright ball ornaments from Target for extra color. She and Robert decorated it together, and I wove in some ribbon with Regan snuggled up against me in the Moby wrap. Teamwork makes the dream work!
Olivia picked out this flamingo ornament this year because she’s totally obsessed. Every flamingo she sees she names “Frank”. She loves them so much that she had a flamingo themed pool party this year in our backyard for her birthday, so it seemed totally fitting to make it this year’s special ornament for her.
All of the other ornaments are little special knick-knacks we’ve held close over the years. These were Olivia’s very first pair of shoes that we use as ornaments, and we’ll be saving a pair of Regan’s to use next year too when she outgrows them.
On the shelf, I just lined up a collection of little white houses I bought last year in Target’s Dollar Spot along with some Christmas village houses I spray painted white.
I wove in some coiled garland and attached some miniature bright colored ball ornaments we already had from her playroom in our old house. And these little nutcrackers are from my ballet dancing days when I was in middle school and high school. I danced in The Nutcracker every year, and my parents always gave me a little nutcracker doll in my bouquet at the end of each performance. I saved them all, and now 15-20 years later, here they are passed down to my own little girls.
For her mantel, I already had the garland, wreath, and NOEL sign from when I decorated her old playroom at our last house a couple of years ago.
The little wooden shoes came from my grandfather when he brought them back from a trip to Amsterdam for my brother and me when I was 5. He passed away 8 years ago, but seeing them on this playroom hearth makes me smile every day and makes me think he’s looking down on his great-granddaughters in a way. Olivia clomps around the house in them just like my brother and I did.
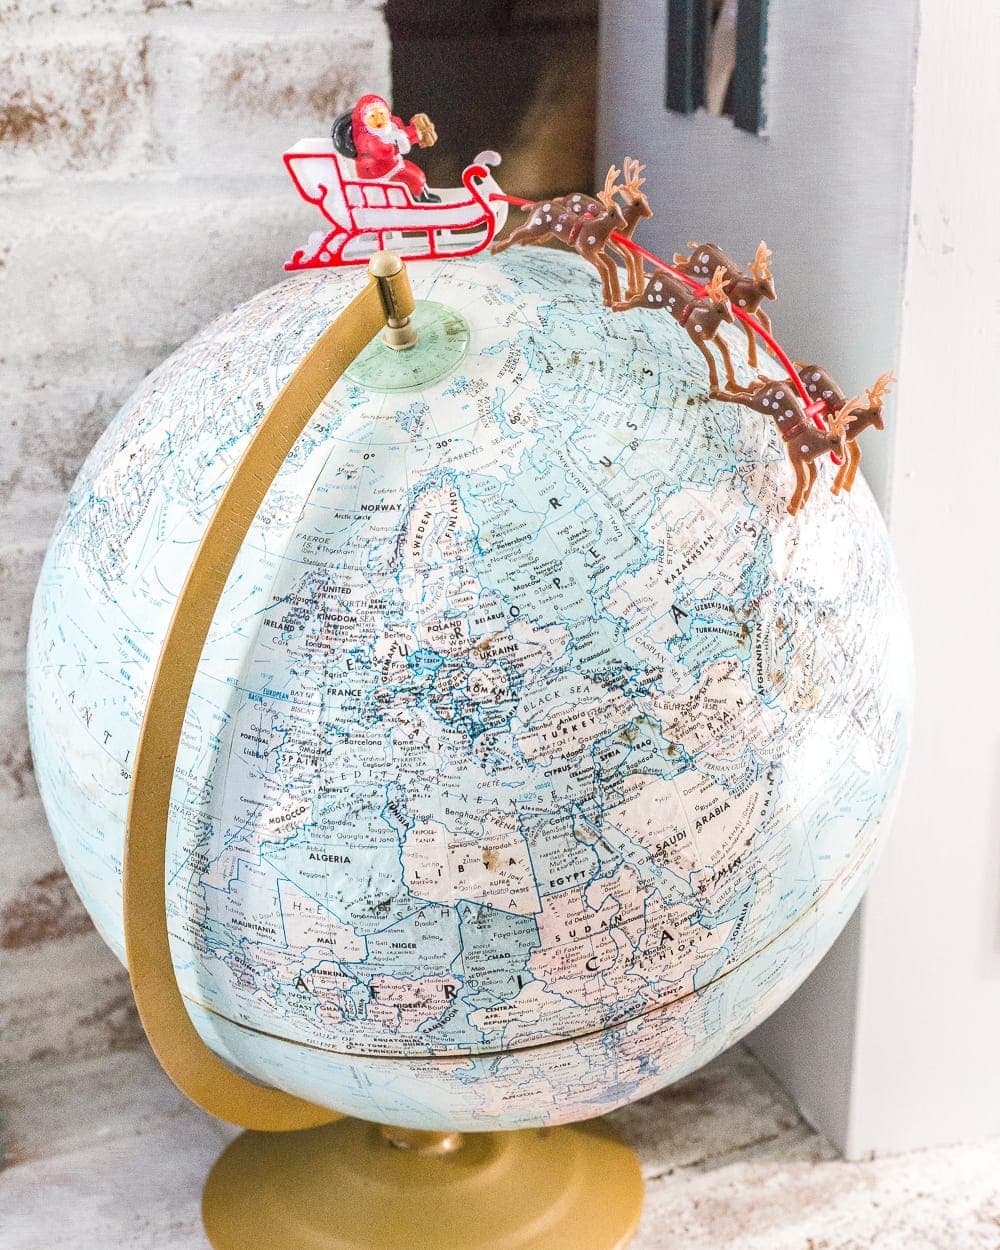
After I shot this fireplace picture, I went and grabbed this toy Santa sleigh and stuck it on top of this $8 thrifted globe. How cute is that?!
So now Olivia gets her own colorful winter wonderland! Last year she asked me, “Do you think Santa will come down my playroom fireplace?!” And then I asked her, “Do you think he’ll see how many toys you have and just go right back up the chimney?” Her response was, “Um… maybe he should go down the living room fireplace. That’d be better.” This girl thinks she’s fooling someone.
If you want to know about any of the paint colors or DIY tutorials we did in this space, you can see the full playroom makeover reveal here (and our old playroom is in this post). I swear this is the #1 room in our house that helps me keep my sanity. The next stop on the Kid Christmas Tour is my friend Chelsea from Making Home Base. Her little girls’ space has my Nutcracker lovin’ HEART! If you have some kiddos of your own you like to decorate for, you can see all of the other kids’ spaces in the tour for more ideas: Two Twenty One // House by Hoff // At Charlotte’s House // Making Home Base
Casa Watkins Living // DIY Decor Mom // Bless’er House // The DIY Village
Heathered Nest // Southern State of Mind // Rain on a Tin Roof // Haneen’s Haven
Or if you want to shop anything in this post, you can click the images below:
//
!function(d,s,id){
var e, p = /^http:/.test(d.location) ? 'http' : 'https';
if(!d.getElementById(id)) {
e = d.createElement(s);
e.id = id;
e.src = p + '://widgets.rewardstyle.com/js/boutique.js';
d.body.appendChild(e);
}
if(typeof window.__boutique === 'object') if(d.readyState === 'complete') {
window.__boutique.init();
}
}(document, 'script', 'boutique-script');
//
 Turn on your JavaScript to view content Turn on your JavaScript to view content
The post Colorful Christmas Playroom appeared first on Bless'er House. Originally from Bless'er House https://ift.tt/2SfLP9E
0 Comments
Armchairs, sofas, and ottomans are the most common pieces of fabric upholstered furniture found in most homesteads. Fabric always looks great when its new but with time it picks up grime and grease to become dull and worn out. This could be irritating for many while they probably don’t know how easy it is to clean upholstery fabric. A scrupulous cleaning, using simple home scrubbing products, will not only extend the life of your upholstered fabric but also bring back its initial softness and vibrancy.
It is therefore recommended that you clean your upholstery fabric regularly as it eliminates loose debris and dirt from the surface of the fabric. This reduces the chances of dirt working its way into the fibers of your upholstery fabric. A sticky lint roller would come in handy as it picks up hair, dust, and crumbs easily. It also has the benefit of raising the fabric's nap instead of leveling it and allowing dirt deeper into the pile just like a brush.
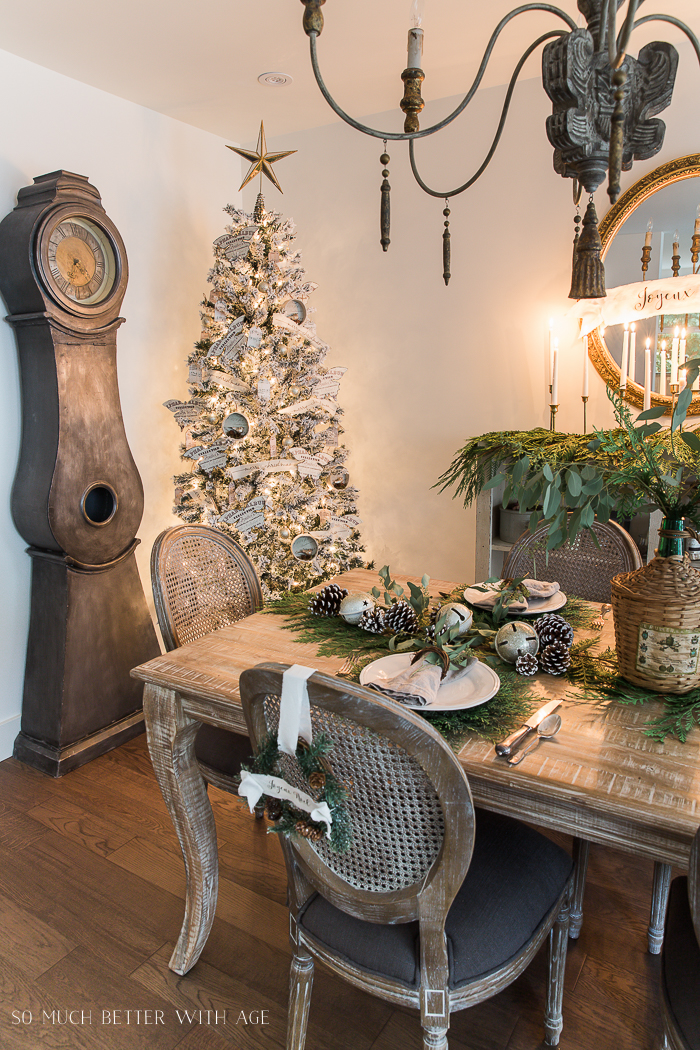
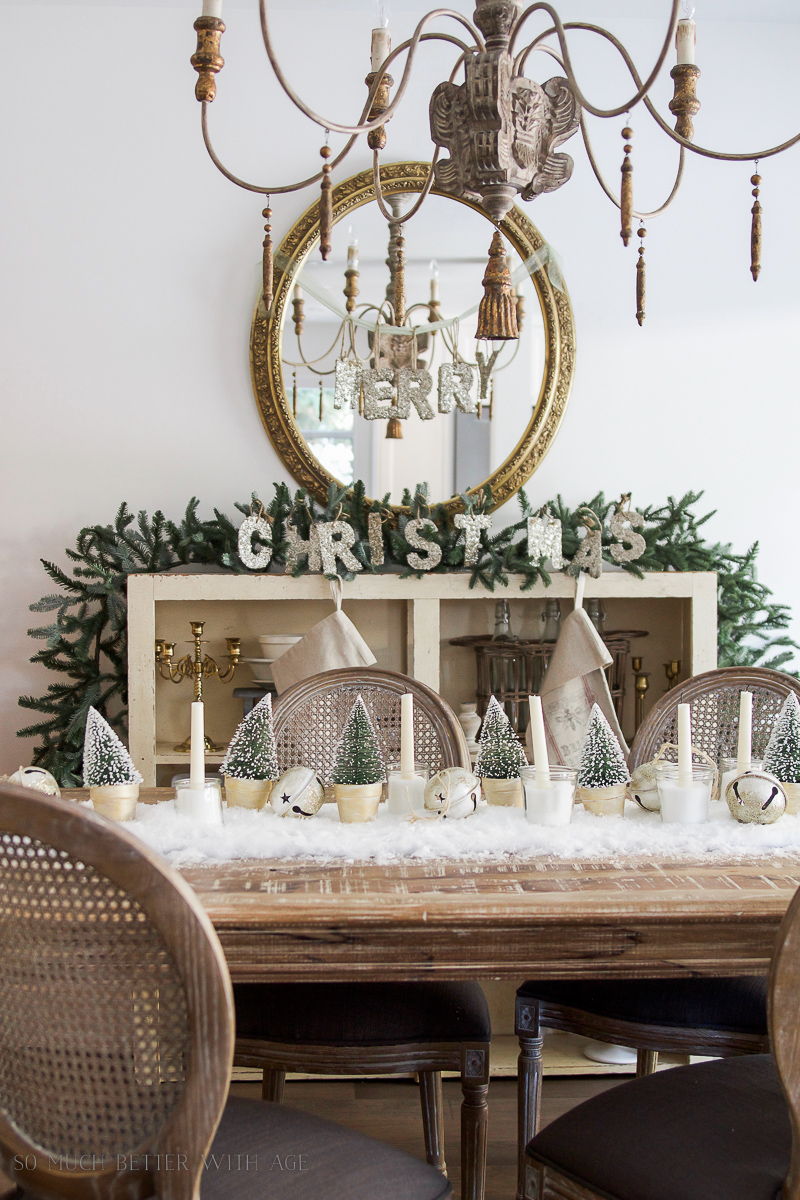
If you want your upholstered furniture to look as good as new for future years, then, ensure you place them in a clean environment and remove surface dirt on a regular basis. Tips for changing up your decor for Christmas every year and sticking to a budget by repurposing, remaking, and choosing versatile color palettes.Hi Bless’er House readers! I’m Jamie and my blog is called So Much Better With Age. I’m so honored Lauren asked me to write a guest post on her blog. That girl could ask me anything and I’d say yes because she is honestly as sweet in person (if not more so!) than she appears on her blog. I’m from Vancouver, Canada and I usually see Lauren every year at the Haven conference but I didn’t go this year so I’m hoping to see her next year! Here is my post, I hope you enjoy it! How do you change up Christmas decor without buying everything new? Each year I try to think of different ways of changing my Christmas decor without buying anything new. Now not being able to buy anything might be a challenge but even if it’s a few things from the dollar store, I try to change it up each year so it looks completely different from the year before but still using the same faux trees, garland and decorations. I have two Christmas trees and ornaments for both and the ornaments are all in the same color family, basically neutral. I love my neutrals and they look so pretty against a green tree but you can still use these tips if you have different colored ornaments. Dining Room DecorYou can see in my dining room for 2016 I made a snowy and glittery theme. I used gold ribbon on the tree and added epsom salts down the middle of the table for a snowy centrepiece/runner.
For Christmas 2017, I used the same tree and ornaments but added a new tree topper and didn’t use the glittery ribbon from the year before. The table was covered in evergreens to make it my French Christmas dining room with evergreens, pinecones and banners.
For Christmas 2016, I hung two garlands over the little furniture piece with glittery letters from Michael’s (I believe they were $1 each) to spell out Merry Christmas (I added Merry to the mirror.)
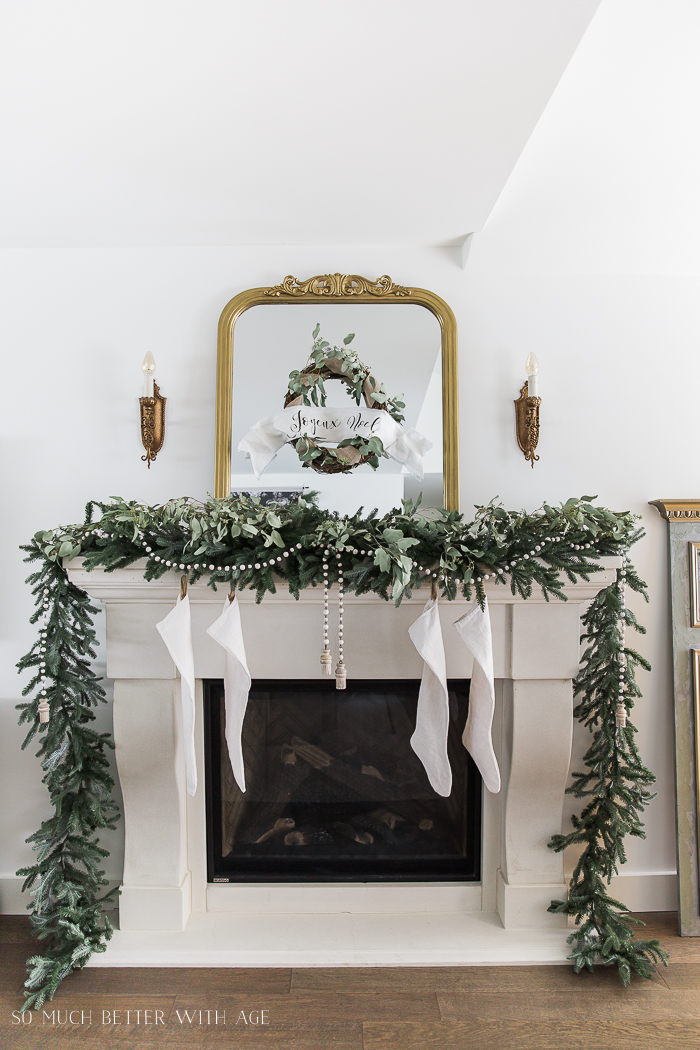
For Christmas 2017, I added evergreens and brass candlesticks from thrift shops to the top of the cabinet and made these handmade Joyeux Noel banners. I also added more evergreen clippings to the table and pinecones from the dollar store along with some recycled jingle bells I hadn’t used for a number of years.
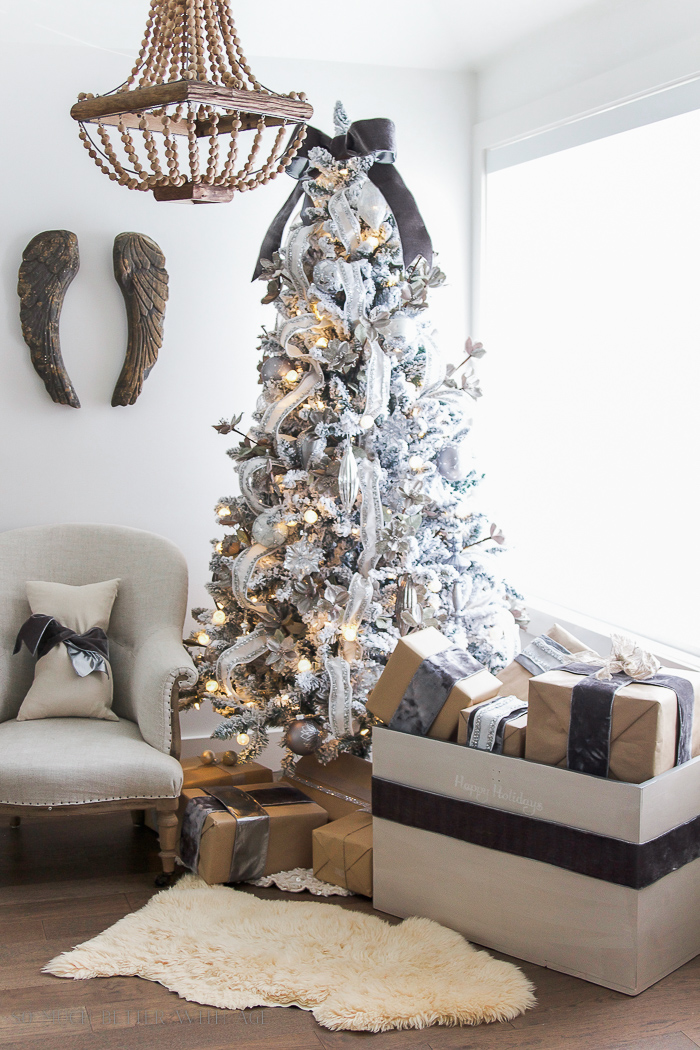
Living RoomFor my living room in 2016, I took some angel wings that were in another room and added them with command strips to the wall. The ornaments were silver and glittery. (Both my Christmas trees are faux flocked trees.) I also painted this thrift store trunk that was missing a lid in a glittery silver color to hold Christmas presents.
I used the same decorations from 2016 on my 2017 Christmas tree but added a crown as a tree topper and the glittery ribbon from the 2016 dining room tree. I also switched up a few of the ornaments from the dining room tree and didn’t add the picks.
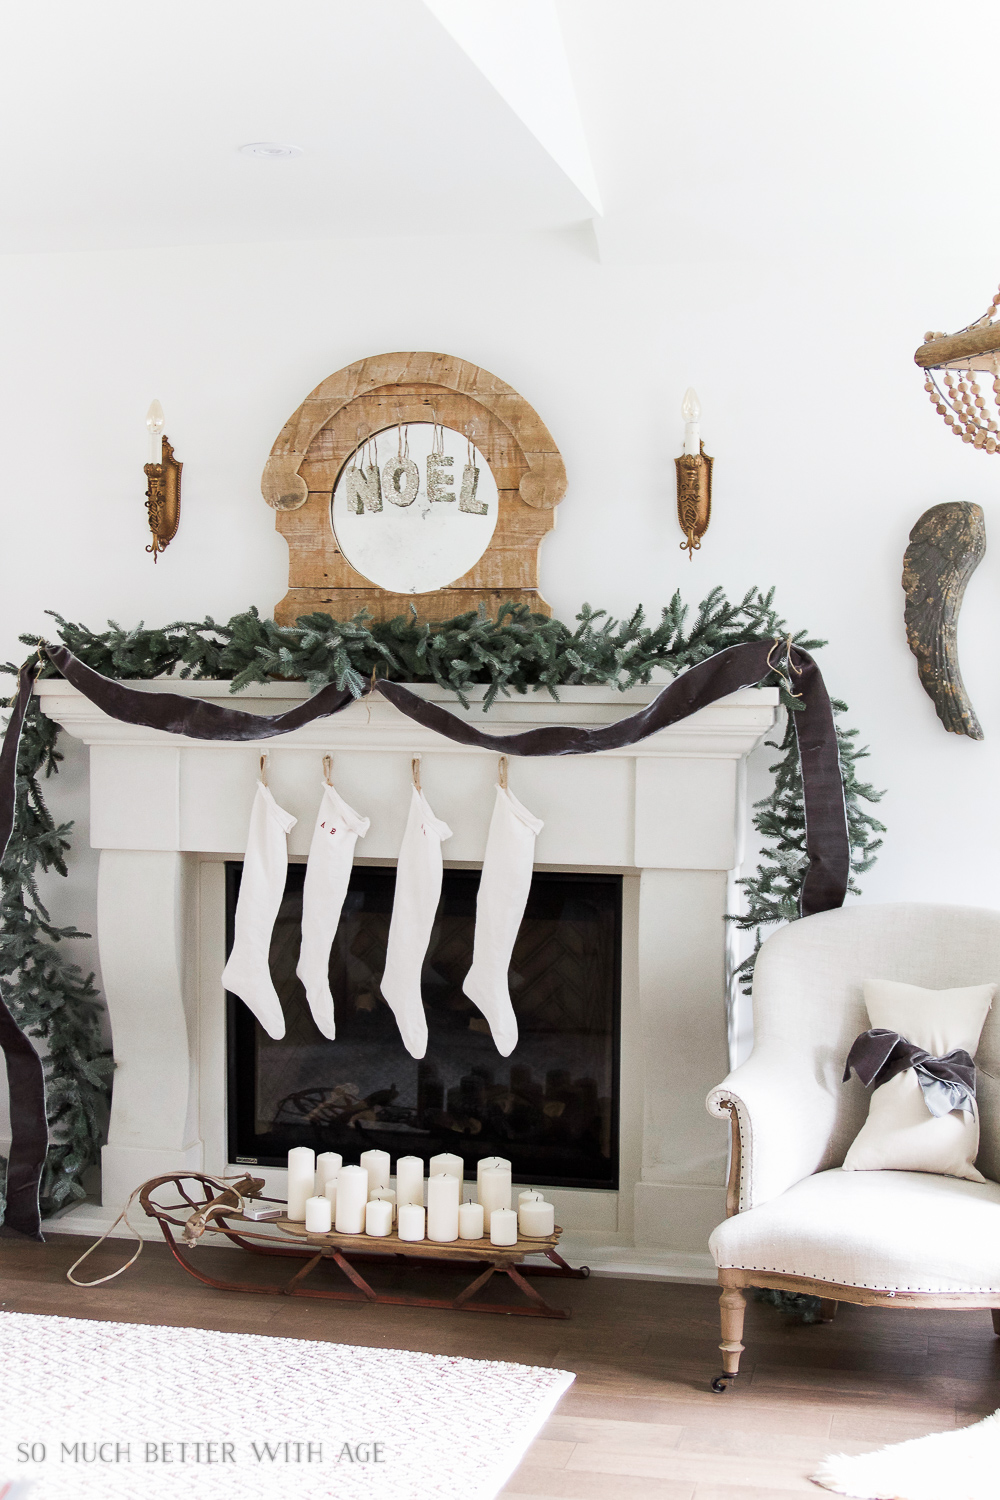
For my mantel in 2016, I used two garlands, grey velvet ribbon and I made European looking stockings.
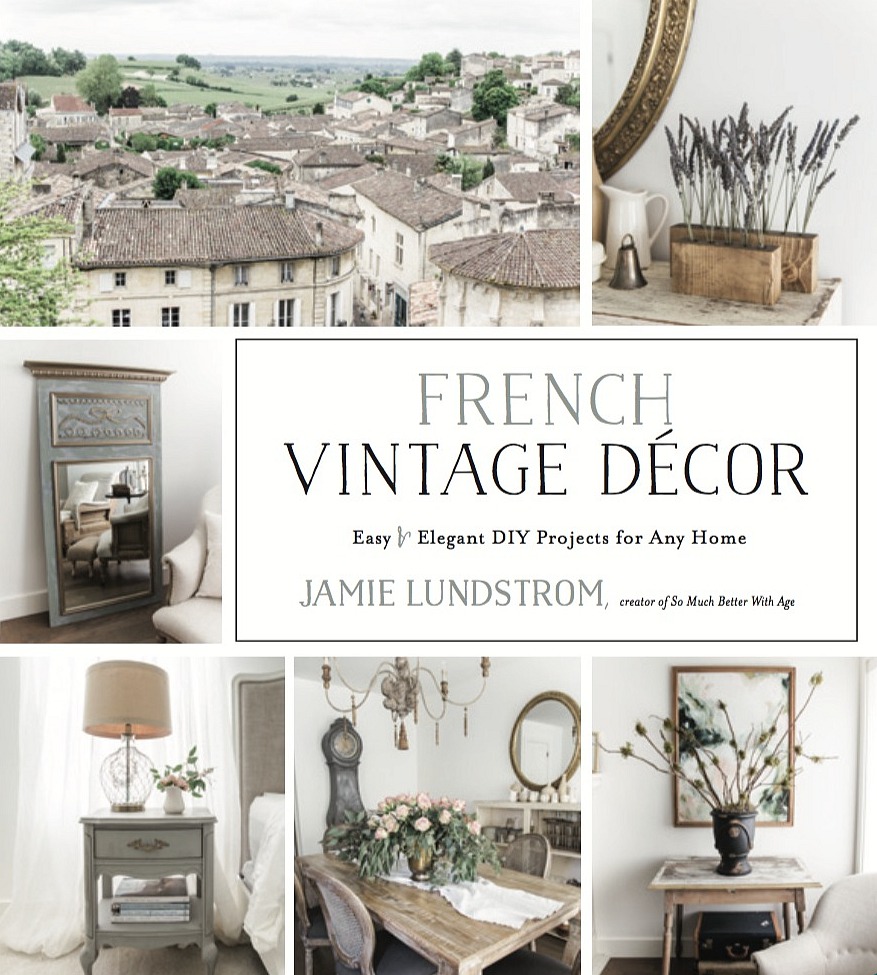
I have these two mirrors that I alternate with throughout the year (the mirror below is a thrift store wooden mirror that I gave a complete makeover. It’s one of the 70 projects that I did for my book, French Vintage Decor.)
I hope these tips were helpful in finding ways to change your Christmas decor each year without buying anything major each year. To see more Christmas tours, click here. To see more Christmas projects, click here. To buy my book, French Vintage Decor, click here (affiliate link):
The post How to Change Christmas Decor Each Year Without Buying New appeared first on Bless'er House. Originally from Bless'er House https://ift.tt/2BDFy1Z
Via http://thepaintedhive.net/2018/11/boys-tiny-lodge-style-bedroom-reveal/ A Christmas home tour with decorating ideas using thrift store projects, DIYs, free printables, and budget-friendly decor tips that are easy to do.Merry Christmas, y’all! It feels so good to finally say that since our house has technically been decorated for the occasion for nearly a month now. I am absolutely overjoyed to show y’all around our digs today for Jennifer Rizzo’s Holiday Housewalk! If you’ve never heard of this tour, it runs Monday through Friday, each day featuring a group of bloggers’ homes all gussied up for the holidays. I’m so honored to be among them this year! We are stop #7 on the tour today. You can see Jennifer’s gorgeous home at Dear Lillie for stop #6 or start from the beginning of the tour at Jennifer Rizzo’s.
I moved into this house just a year and a half ago in the suburbs of Charlotte, North Carolina with my hubs Robert and 6 year-old daughter Olivia. We have extra cause for celebration this year as we just brought home our baby girl Regan 6 weeks ago! Decorating for Christmas on very little sleep has been… um… interesting. Ha! Totally worth it though. Our house has come such a long way in a short amount of time thanks to a lot of DIY projects, working with what we have, scouring thrift stores, and good ol’ hard work. Foyer
Right when you walk through our front door is our foyer with my and Robert’s childhood homes framed on the wall. It’s the perfect reminder of our roots and all we hold dear.
Behind me is still a major work in progress, but for the rest of this foyer, a strand of garland on the banister and a vase of holly perks it right up for Christmas. Normally, I love using fresh greenery, but with a baby in the mix this year, I’m just lucky there’s not laundry toppling over on the steps and dirty shoes by the door.
This marble topped Eastlake chest was actually a cheapo Craigslist find that I just gave a good scrub down, and it was the perfect spot to display our nativity scene. It seemed like the perfect place to show off the most important reason for the season front and center.
That is along with photos of our family, important reason for the season #2.
This post contains affiliate links for your shopping convenience. Click here to read my full disclosure policy.
//
!function(d,s,id){
var e, p = /^http:/.test(d.location) ? 'http' : 'https';
if(!d.getElementById(id)) {
e = d.createElement(s);
e.id = id;
e.src = p + '://widgets.rewardstyle.com/js/shopthepost.js';
d.body.appendChild(e);
}
if(typeof window.__stp === 'object') if(d.readyState === 'complete') {
window.__stp.init();
}
}(document, 'script', 'shopthepost-script');
//
Turn on your JavaScript to view content
Dining RoomPast our foyer is the dining room, which sees more action now than any other time of the year.
This table was a Craigslist find too that we jazzed up with a DIY oak top, and this wall of mirrors were all ones I collected from thrift stores and eBay.
I love how they bounce the light around and catch the glitter of our Christmas tree in the corner to add even more twinkle in the room.
On the table, I just stuck this pedestal bowl I found for $5 at Goodwill with some glass ornaments as a centerpiece.
And the place settings feel a little extra special with a simple bow of green ribbon as a napkin holder.
//
!function(d,s,id){
var e, p = /^http:/.test(d.location) ? 'http' : 'https';
if(!d.getElementById(id)) {
e = d.createElement(s);
e.id = id;
e.src = p + '://widgets.rewardstyle.com/js/shopthepost.js';
d.body.appendChild(e);
}
if(typeof window.__stp === 'object') if(d.readyState === 'complete') {
window.__stp.init();
}
}(document, 'script', 'shopthepost-script');
//
Turn on your JavaScript to view content
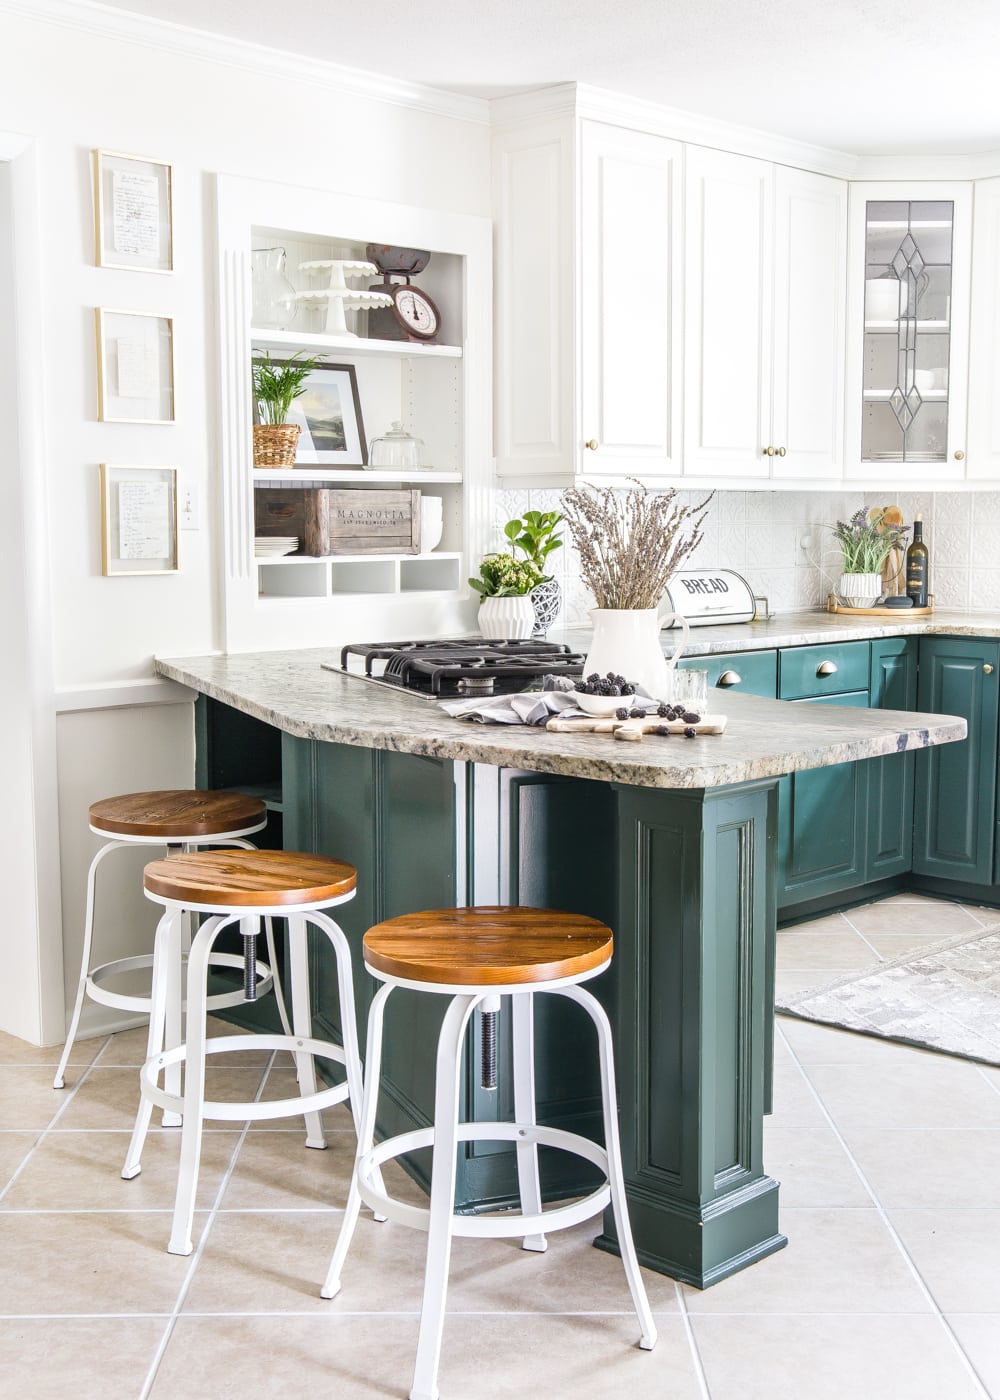
KitchenPast our dining room is our kitchen that we gave an inexpensive facelift this past summer using mostly just paint. The dark green lower cabinets are perfect for Christmas!
We plan to do a full gut job one of these days by ripping out the tile floors and reworking the layout, but this is one of those work-with-what-you-have spaces that turned out so much better than I ever imagined.
Over the window, we hung up this artificial pine garland that is the most realistic plastic one I’ve ever seen. And that magnolia wreath and those artificial paper whites make doing dishes so much more enjoyable.
Before jazzing up this space this year, I really wasn’t a fan of these kitchen shelves, but now they’re one of my favorite little corners to decorate. Beside the shelves, I preserved and hung up three handwritten recipes from both of my grandmothers and great-grandmother. Cooking up a storm during the holidays always reminds me of them, so it seems only fitting to honor them in my kitchen when I usually need their legacy of cooking skills the most.
For some extra Christmas twinkle, I stuck some fairy lights underneath a cake dome and cloche and found these adorable gingerbread houses to display (because we do not possess the artistic skills around here for real ones).
A little tip if you ever need to make a pretty Christmasy dessert; fill up a supermarket bundt cake with fresh cranberries and no one will be the wiser.
//
!function(d,s,id){
var e, p = /^http:/.test(d.location) ? 'http' : 'https';
if(!d.getElementById(id)) {
e = d.createElement(s);
e.id = id;
e.src = p + '://widgets.rewardstyle.com/js/shopthepost.js';
d.body.appendChild(e);
}
if(typeof window.__stp === 'object') if(d.readyState === 'complete') {
window.__stp.init();
}
}(document, 'script', 'shopthepost-script');
//
Turn on your JavaScript to view content
EntrywayOur back door is just past our kitchen where we normally have coats and boots flung everywhere.
I love swapping out this gallery wall every season of the year with different botanical prints that I printed for $3 each. You can grab your own in this post. I usually keep them displayed all the way through January and February too.
P.S. The sporting equipment section of Goodwill is one of my favorite secret places for finding Christmas decor. It’s where I found these used figure skates. They hung on our front door with some ribbon as a makeshift wreath a few years ago too. And this year, I scored a pair of old snow skis that I’m currently painting and can’t wait to show off soon.
//
!function(d,s,id){
var e, p = /^http:/.test(d.location) ? 'http' : 'https';
if(!d.getElementById(id)) {
e = d.createElement(s);
e.id = id;
e.src = p + '://widgets.rewardstyle.com/js/shopthepost.js';
d.body.appendChild(e);
}
if(typeof window.__stp === 'object') if(d.readyState === 'complete') {
window.__stp.init();
}
}(document, 'script', 'shopthepost-script');
//
Turn on your JavaScript to view content
Living Room
Out of all of the rooms in our house though, my favorite is definitely the living room. We watch every Christmas movie known to man in here while we flop together on the couch with popcorn.
And while midnight feedings with baby Regan are usually exhausting, they feel so much more enjoyable by the glow of the Christmas tree.
Little tip: you can decoupage old sheet music to just about anything, including plastic Walmart ornaments, and it will look instantly cute and vintage-y.
Every year, I try to change up our decor without spending too much or adding more stuff to our stockpile. Just swapping out a couple spools of wire ribbon normally does the trick to create a whole new look from the year before. This was a Black Watch Tartan plaid kind of year.
Two spools of ribbon was all it took to add a little drama to the tree, the mantel, and some of our presents for a grand total of $12.
To make our Target stockings look like custom designer ones, I just attached these ID badge tags and made name labels on my own printer (which you can get for yourself here).
And adding a couple of candles always makes the room feel warm and inviting in the evenings when it gets dark so crazy early.
Adding these IKEA wreaths to our windows makes the whole space feel extra cheerful too.
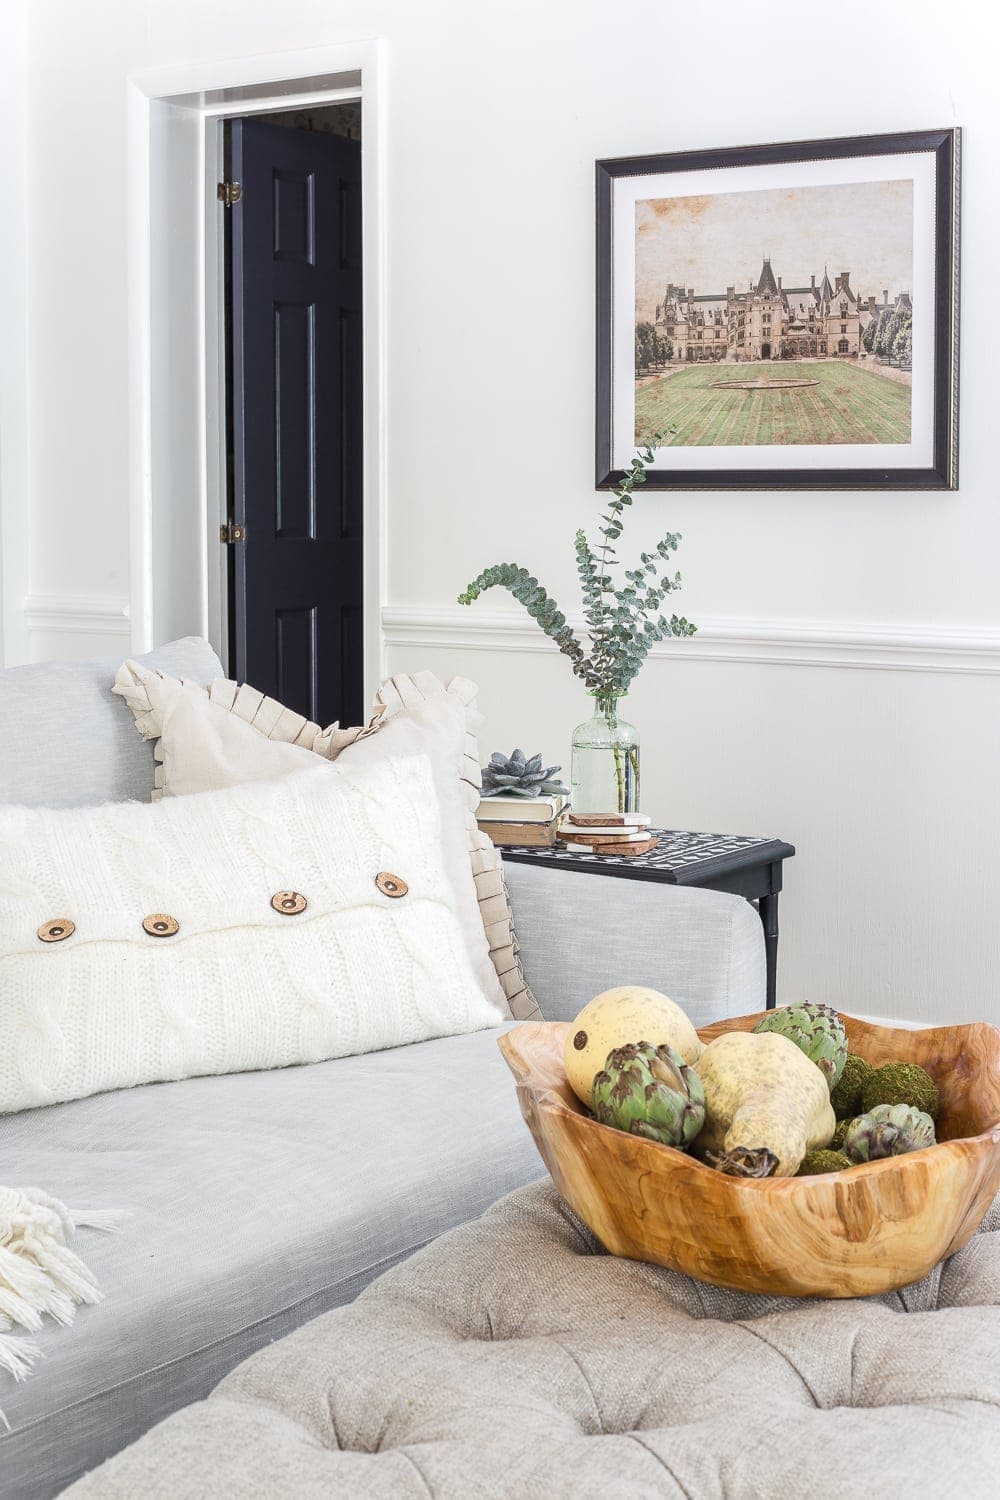
One thing I’ve learned to cut down on the Christmas storage and stretch our decor into other seasons though is to use non-seasonal specific pillow covers. I used all of these green pillow covers this past fall and just kept them on into the holidays by changing the greenery in the space instead. Green and blue are my favorite colors to decorate with because they can work for any time of year.
//
!function(d,s,id){
var e, p = /^http:/.test(d.location) ? 'http' : 'https';
if(!d.getElementById(id)) {
e = d.createElement(s);
e.id = id;
e.src = p + '://widgets.rewardstyle.com/js/shopthepost.js';
d.body.appendChild(e);
}
if(typeof window.__stp === 'object') if(d.readyState === 'complete') {
window.__stp.init();
}
}(document, 'script', 'shopthepost-script');
//
Turn on your JavaScript to view content
If you want to see the rest of our house or want to know about any of the other sources and DIY tutorials in these rooms, you can see our home’s full before and after here. I can’t wait to see even more of this place’s progress in 2019 because we still have plenty more rooms untouched since our move that we can’t wait to get our hands on.
No matter how our home looks though, it’s the people who fill these rooms who matter more than anything. And I hope you remember the same thing at your house too. “Because the beauty of Christmas is not in the presents but in His presence.” Thank you so much for stopping by for a visit! Next stop on the tour is Annie’s house at Zevy Joy. I promise you will be blown away by her style!
Merry Christmas, friends!
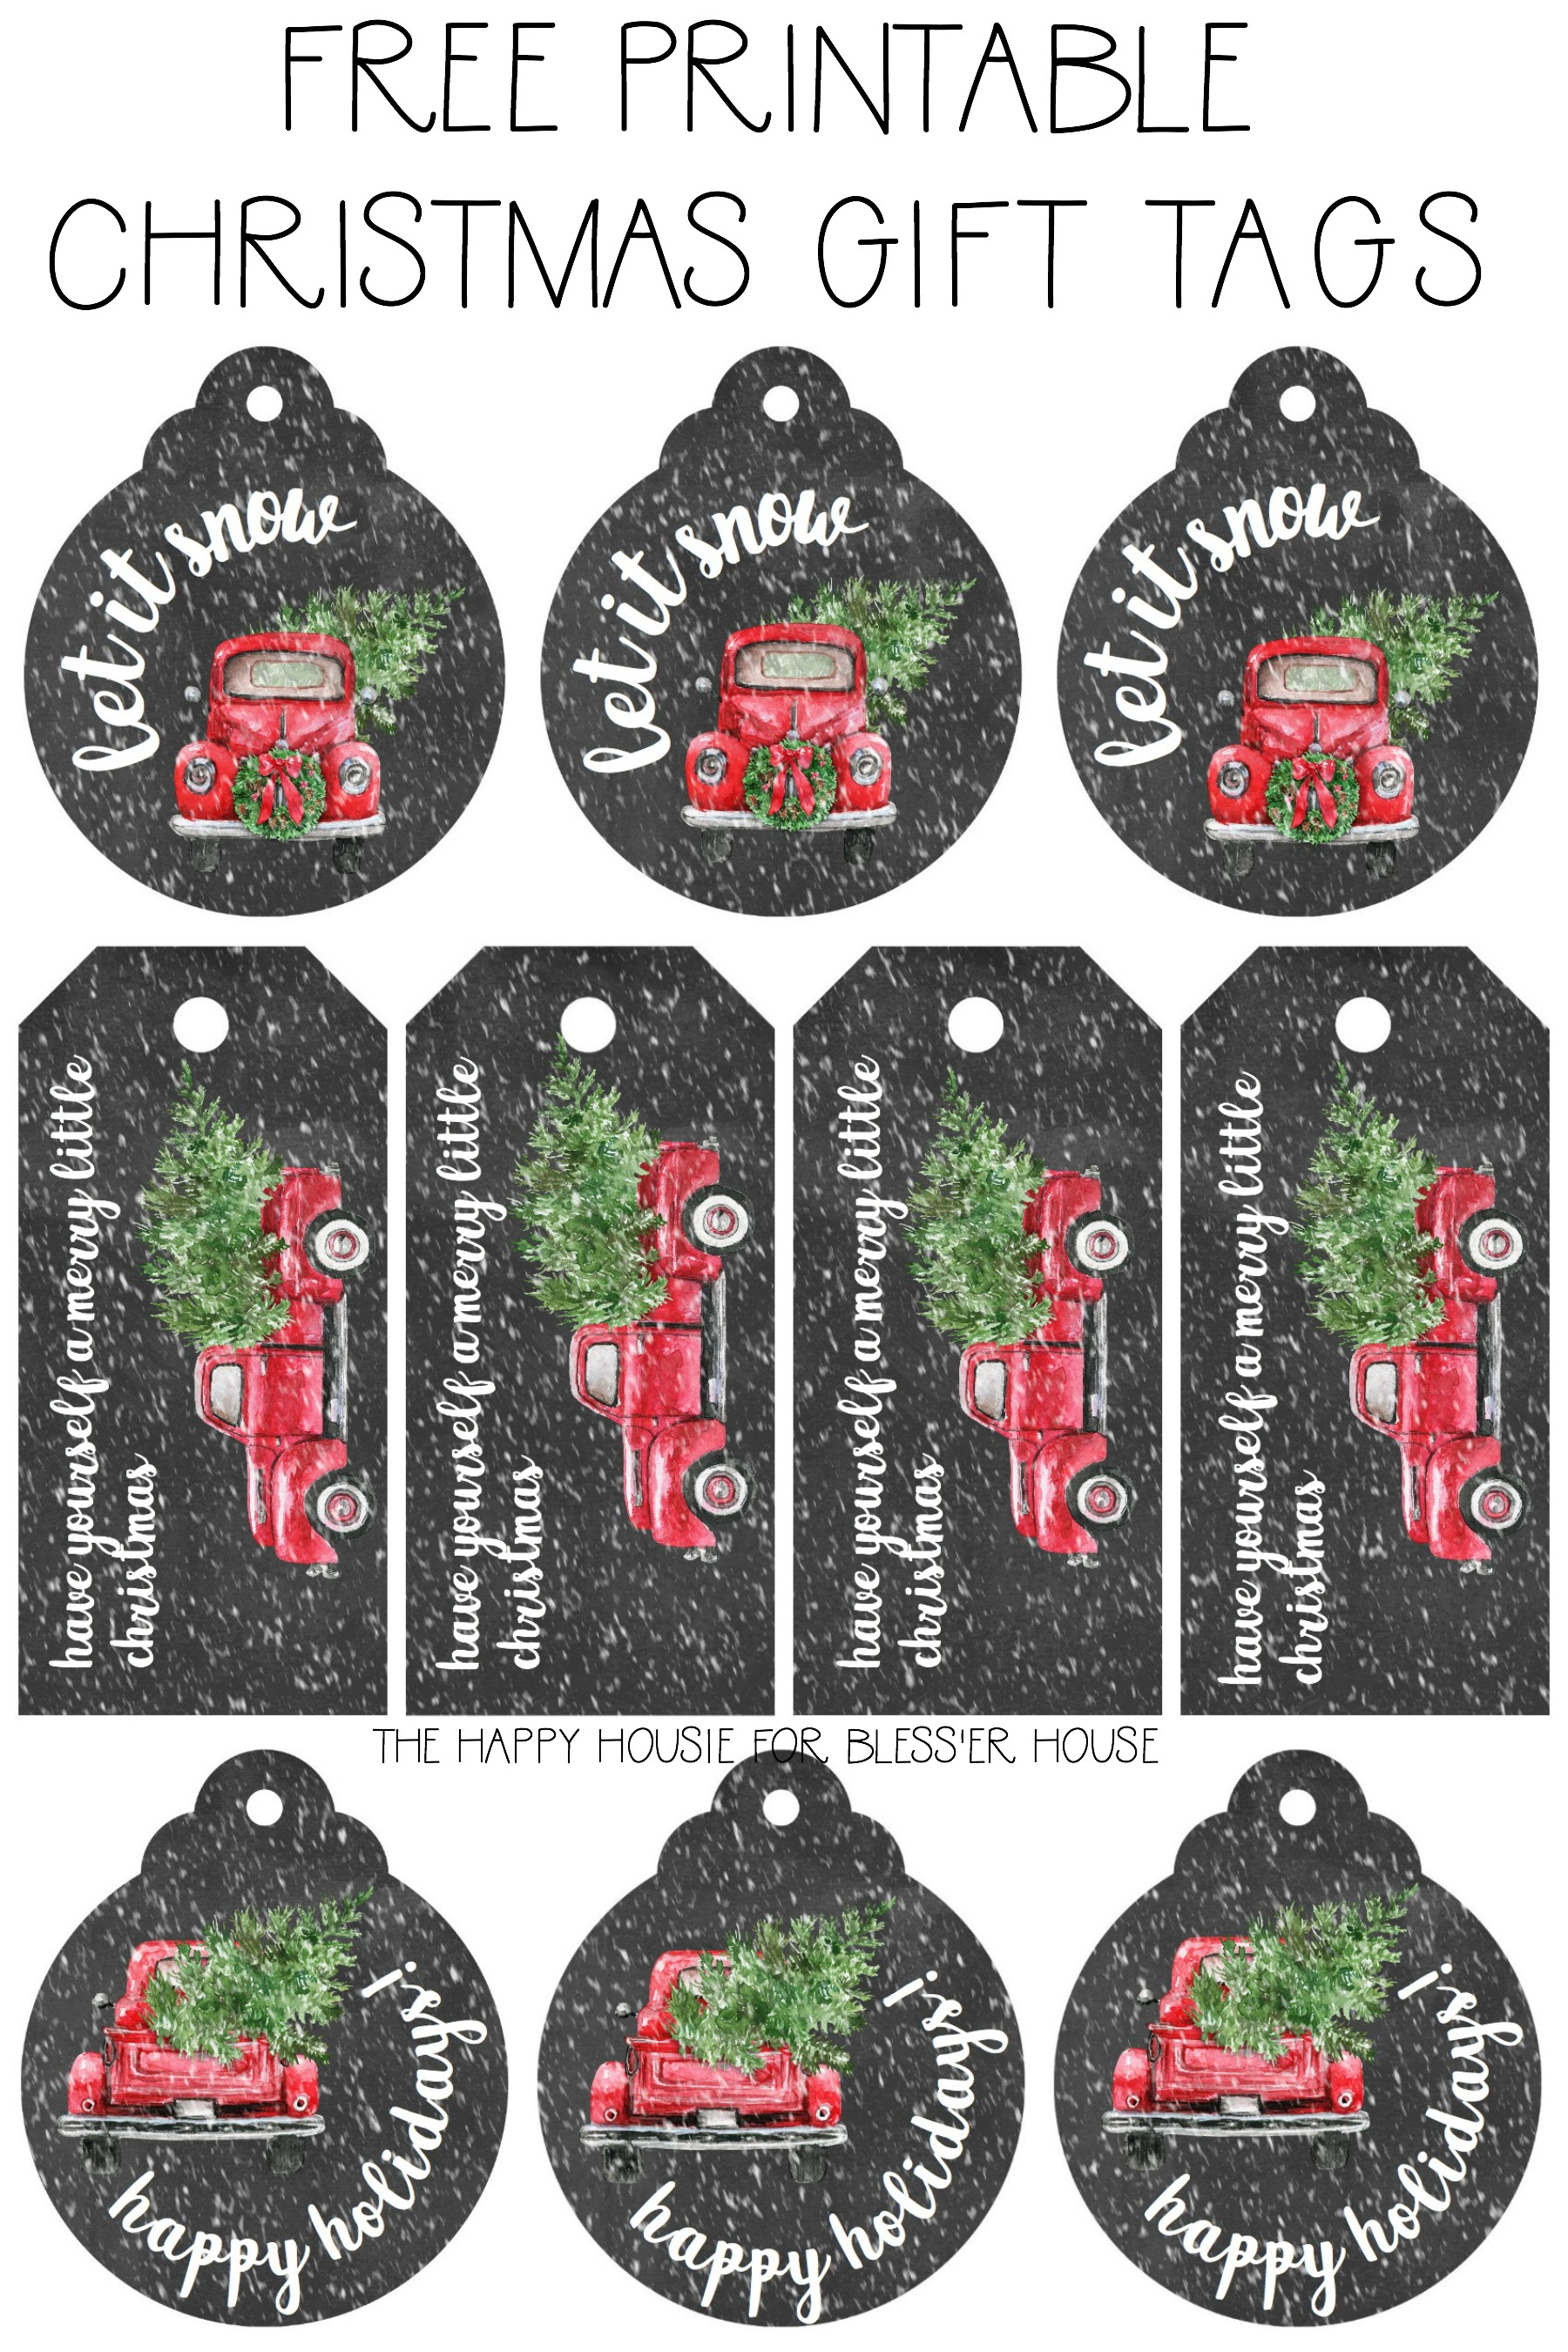
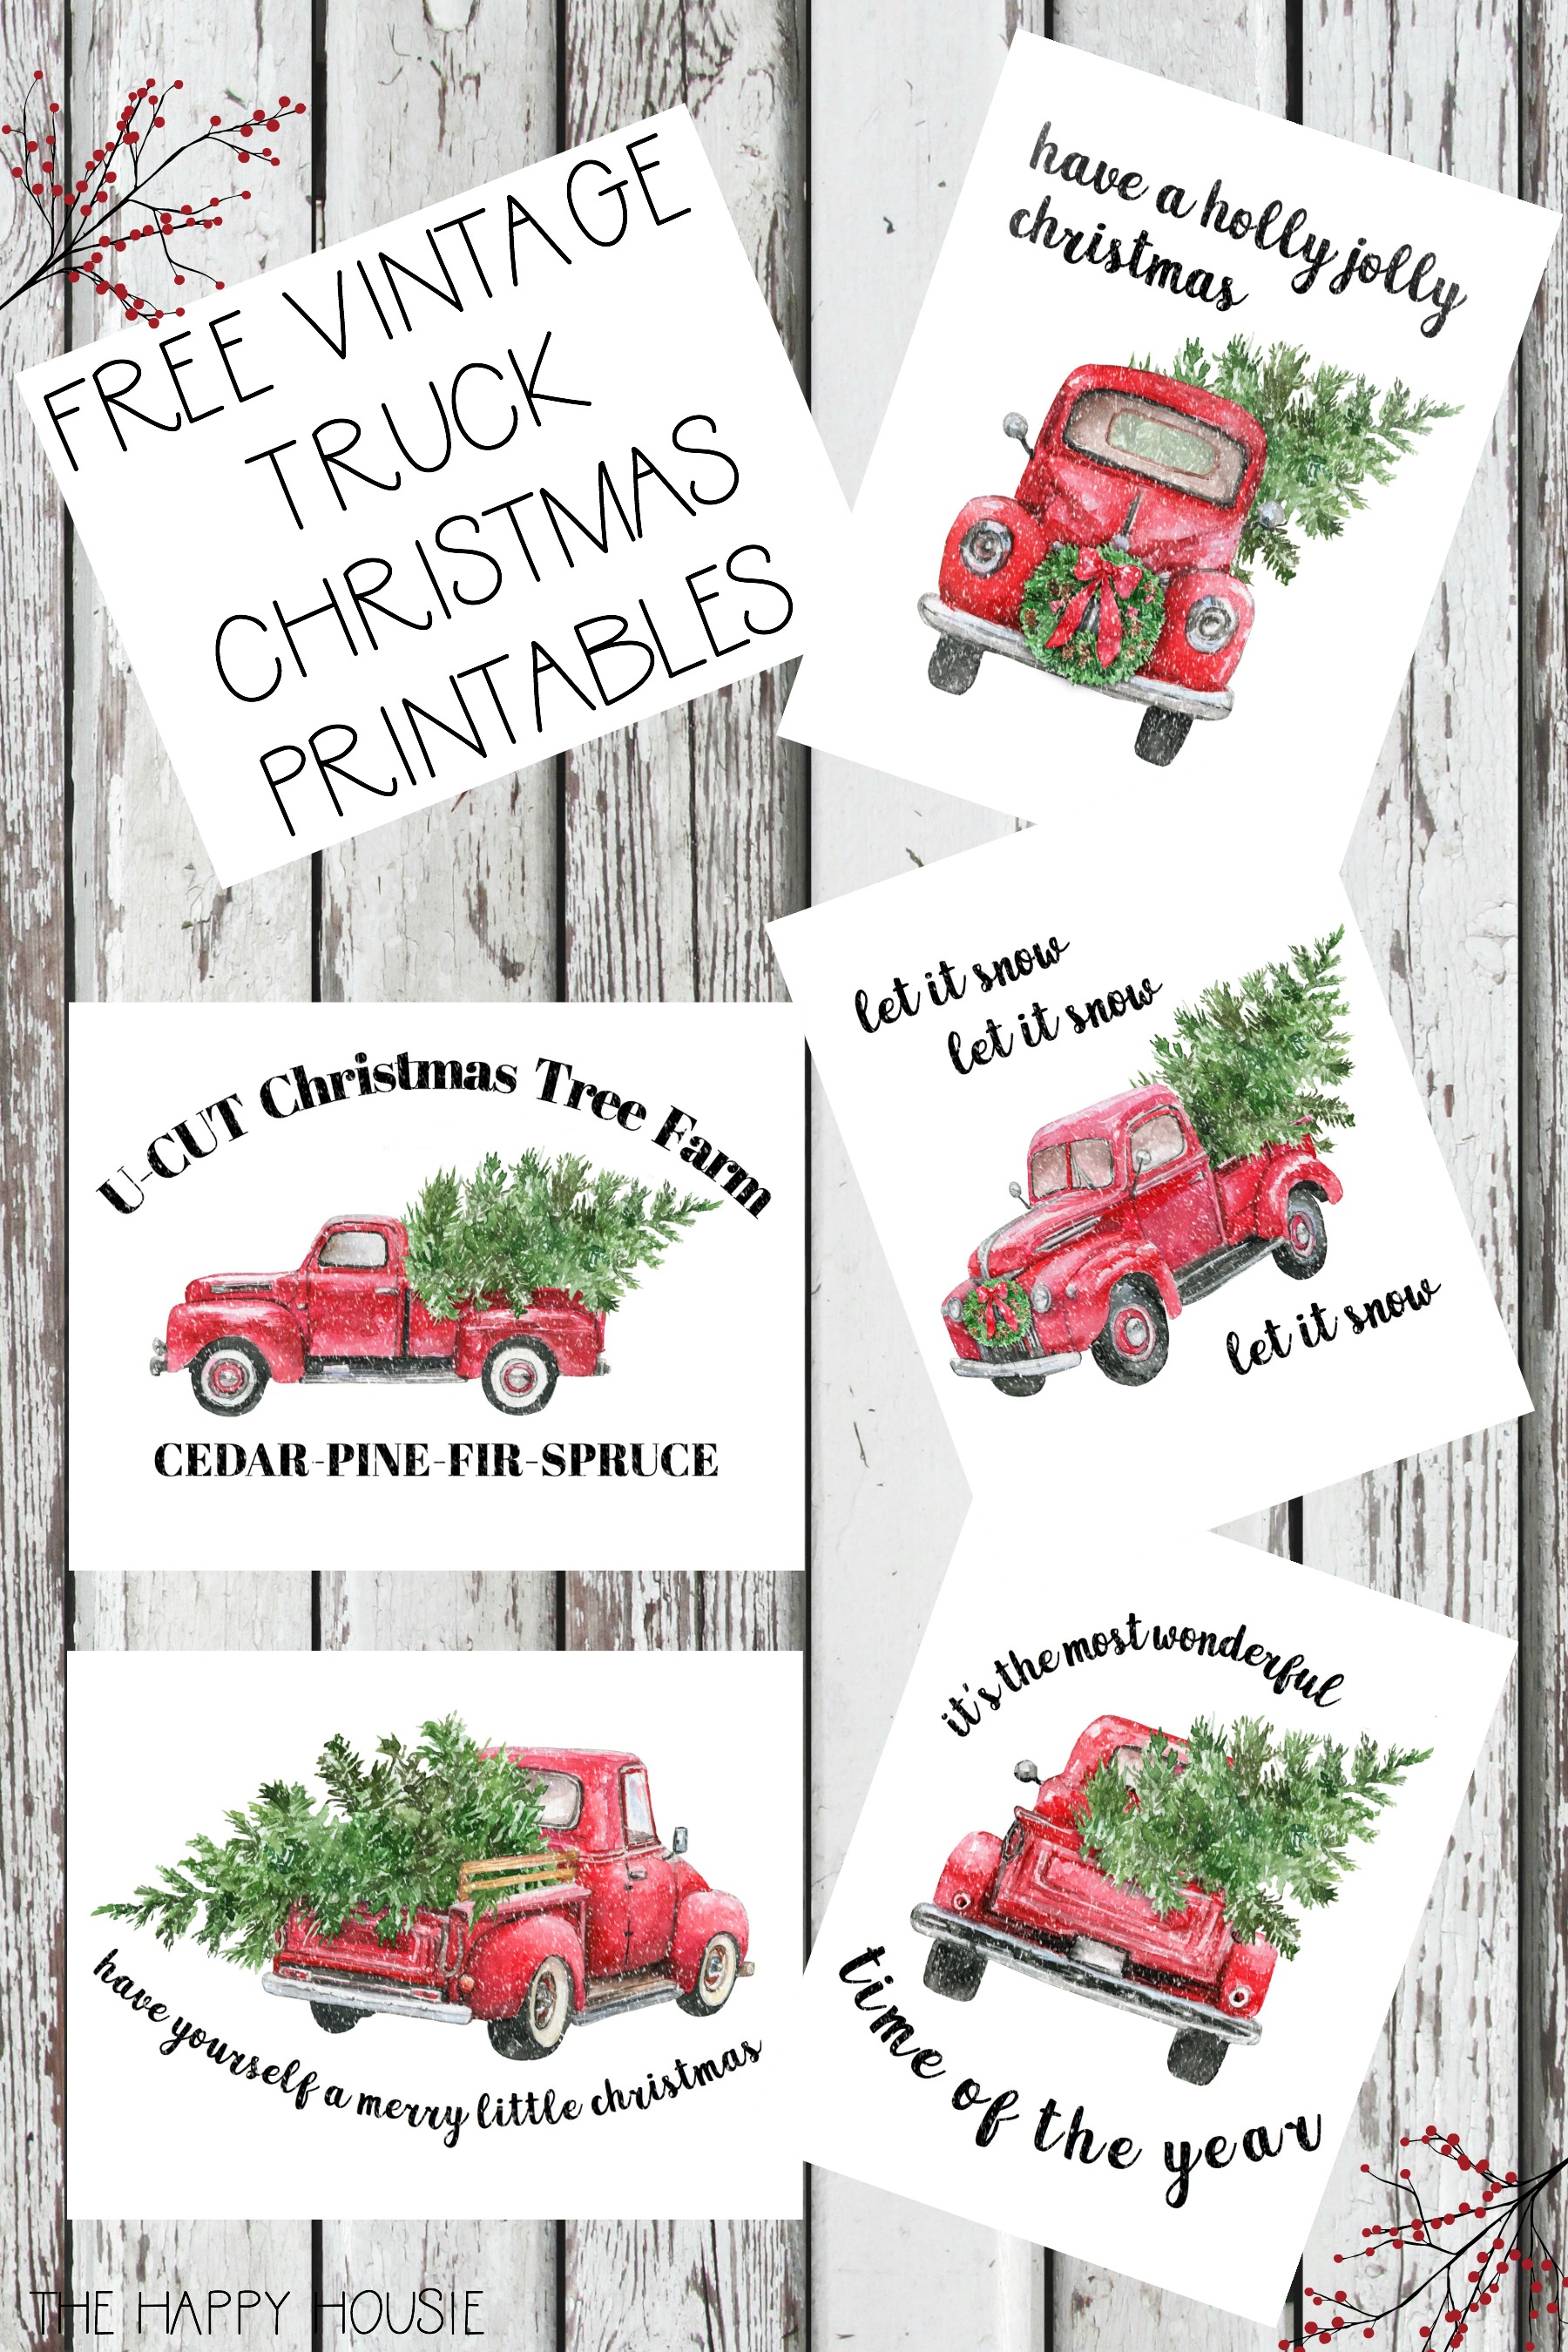
The post Holiday Housewalk 2018 appeared first on Bless'er House. Originally from Bless'er House https://ift.tt/2Bx5tbv Hello fabulous Bless’er House readers! I’m Krista from The Happy Housie, where I share all kinds of ideas and inspiration for DIYing, decorating, crafting, and organizing your way to a home that you and your family love. I’m super thrilled to be here today sharing a fun little holiday printable with you, while Lauren is busy taking care of her sweet little family (and hopefully getting some sleep!). Seasonal decorating is one of my favourite things, and I especially love Christmas decorating. I live with my husband and two boys (8 and 11) on Vancouver Island, BC, Canada, and it can be pretty grey and rainy here throughout the winter. I absolutely love the cozy feeling that the Christmas lights bring, and must admit I start pretty early (like November 1st!), and I love to DIY as much as I can during the holidays. With my love of all things Christmas, I wanted to share a sweet little free printable with you today… these cute vintage truck Christmas gift tags!
All you have to do is print these out on some card stock and cut them out! If you have a hole punch, that will work for removing the white hole… otherwise just use some scissors to trim around it.
I love that they add a custom/DIY/homemade feel to gift wrapping…
I made these in a snowy version because who isn’t dreaming of a white Christmas?!…
And also in a crisp (non-snowy) chalkboard version…
You can download your own copy here! Free Printable Christmas Gift Tags With Snow Free Printable Christmas Gift Tags Without Snow If you love these cute little vintage red truck Christmas printable tags, then you might love the printable art versions I made of these and shared on my blog last week. Head over to the Happy Housie to download your own…
I hope you have a cozy holiday full of all things good. Thanks for having me here today, Lauren. Enjoy your first Christmas with your sweet baby girl! -Krista
The post Free Printable Christmas Gift Tags appeared first on Bless'er House. Originally from Bless'er House https://ift.tt/2zd6own
Via http://thepaintedhive.net/2018/11/sooooo-kinda-painted-desk/ Learn how to organize with thrifted finds and get inspired for your next trip to your favorite thrift shop!
Hey there, sweet Bless’er House readers! I’m Abby from Just a Girl and Her Blog, where I share functional and beautiful organizing and decorating ideas to help women create a home that they and their families truly love. I am so, so honored that Lauren asked me to pop in today while she’s spending time with her sweet babe! If you spend any amount of time on my blog at all, it won’t take you long to figure out that I am just a smidge obsessed with organizing… okay, maybe more than a smidge! I love to create systems that help our family’s life run more smoothly, and if I can do that with free or thrifted finds, that’s even better! Today I thought I’d share five of my favorite ways that I’ve managed to create order in our home using items that I found at the thrift store, on Craigslist, or that were handed down to me for free! I hope that these ideas will help get your wheels turning the next time you visit your favorite thrift shop. 5 Ways to Organize with Thrifted Finds1. A Dresser-Turned-Dining Room SideboardMy mom actually found this dresser for us years ago, and after we painted it, it did a stint holding my husband’s clothes and then in my boys’ shared bedroom.
When I was looking for a storage piece for an oddly-sized spot in my dining room, I happened to measure this little dresser on a whim, and it ended up being the exact size I needed! I gave it a fresh coat of paint and removed the door, adding a shelf so that I could display some serving pieces.
It became the perfect dining room sideboard, giving me room to store tablecloths, runners, napkins, and other dining room accessories!
You can see the full makeover of this piece in this post and see more of our dining room organization here. 2. Hidden Gift Wrap StorageThis cute trunk acted as a coffee table in the family room of my husband’s house when he was a child. After we were married, we ended up with it and I spruced it up with a little bit of paint! It sat at the foot of our bed for a while, where it gave me a spot to set the laundry basket as I was putting clothes away or was the perfect little seat when we were putting on our shoes in the morning.
The reason I really loved it, though, was because it became the perfect place to store something that can be really difficult to find a good place for since it is so awkwardly shaped: gift wrap!
I used tension rods to hold gift bags and gift boxes along the side, added command hooks to hold a basket of ribbon and bows, and nestled all of my rolls of gift wrap down in the bottom. It was a great little hiding place, and made it easy to get wrapping any time I needed to give a gift! 3. A Dresser-Turned-TV StandApparently I’m kind of into taking dressers and turning them into other things! This piece was my favorite Craigslist find ever. I snagged it for just $40 because it was in rough shape, but I just loved all of the little details and character it had!
Again, I got out my paintbrush and gave it a fresh coat of paint; I ended up spray painting the hardware as well! I removed the top two drawers and used plywood to create a solid surface, which ended up holding our Roku and other TV accessories.
The drawers were nice and big, so I was able to store our DVD collection in one and some extra throw blankets in the other… I am ALWAYS cold! You can get more details about the dresser-to-TV stand transformation here. 4. An Upcycled HutchThis next piece is probably one of the most cherished items we own. It belonged to my grandmother, who passed away when I was in 8th grade, and I love that we have this piece in our home to remind me of her. It was originally stained in an orange-y finish, but I painted it white.
I love to decorate the top part of this china cabinet for each season, and the bottom part is great for storing extra plates and glassware.
Read more about the transformation of this piece in this post. 5. A Vanity to Changing Table to Desk to Kitchen Sideboard MakeoverThis final piece may be the hardest working piece of furniture in our whole house! It has undergone transformation after transformation after transformation and has served us in so many different ways! It was originally a vanity that someone had given to my parents, and it had a mirror attached to it. When my oldest son was born, we removed the mirror, painted it, and turned it into a changing table for him. When both of our boys were out of the diaper phase, we painted this piece again, and it became a desk in our entryway command center.
It held our boys’ school information and also some office supplies that were easy to grab…
When we gutted the kitchen in this house, we wanted some extra work surface space, so we gave this piece yet another paint job and moved it into the kitchen to act as a sideboard.
Who knew one little piece could do so many different jobs?! You can get more info about our command center here and our full kitchen renovation in this post. I love finding all sorts of different ways to organize with thrifted and free finds, and I hope this post gave you some ideas too! If you’re looking to declutter and organize your own home, I would love to invite you to access my vault of monthly decluttering calendars! We declutter a new area of the house every month in tiny little baby steps so that it’s easy to get organized even if you have a super busy schedule. You can join the email list and get instant access to the decluttering vault here. A huge thanks to Lauren for having me today, and thank YOU for reading! Happy organizing!
The post 5 Ways to Organize with Thrifted Finds appeared first on Bless'er House. Originally from Bless'er House https://ift.tt/2DmJ81X A free printable to make any votive holder an easy Advent calendar candle and count down the days until Christmas.We’re officially taking the plunge and untangling the twinkle lights around here… Christmas is 6 weeks away, y’all!!! Robert and I spent all weekend spiffing up the house, and I can’t wait to share it! I know it’s still early for some of you, but since my goal is always to help y’all with decorating ideas, we usually have to jump on the hall decking train extra early at our house. So today, I’m joining in with Kristen from Ella Claire Inspired and a group of blogger friends to share a bunch of free printables to make your holiday decorating a little easier and budget-friendly.
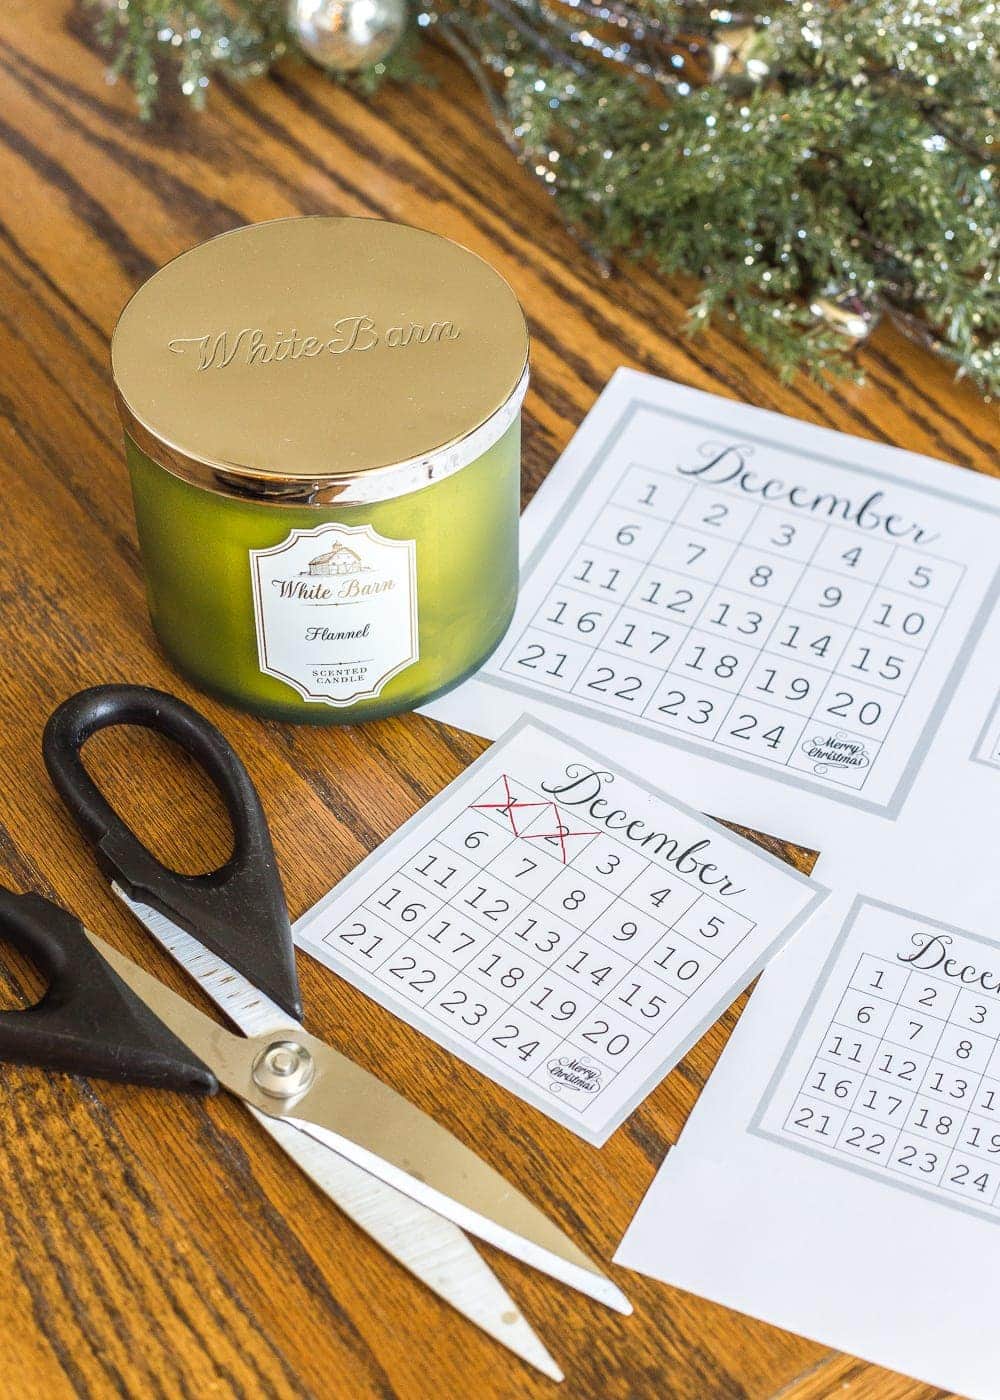
Every year, I go a little crazy with buying yummy smelling Christmas candles because walking into a room that smells like pine tree and holiday spice instantly makes me happy. So this year, after stocking up on a few, I got the idea to make an Advent calendar label for one of mine. With baby Regan in the mix this season, I didn’t really have the time to put together a big Advent calendar with daily treats for Olivia. But I thought it would be fun to have a label on a candle we can light every evening to have fun counting down the days.
If you want the Advent calendar label to print and place on one of your own candles, click here to subscribe or click the button below:
If you’re already a subscriber, the free printable download is in your email. There are four different sizes on the printable, so you can use them for different sized candles. Just print it out on cardstock or regular printer paper, cut it out, and attach it to your candle using Mod Podge or double sided tape.
Then, find a cheery red pen and start counting down to the big day! Even though we stuck to all artificial trees (a couple of Christmas home tours coming soon!) our whole house smells like a giant whiff of pine. Love it!
You can find my other Christmas printables from previous seasons here too: Winter Botanical Printable Set
Advent Scripture Christmas Story Printable Set
Silver White Winters Typography Printable
If you want more Christmas printables to decorate with this year, you can see 25 more on the tour below:
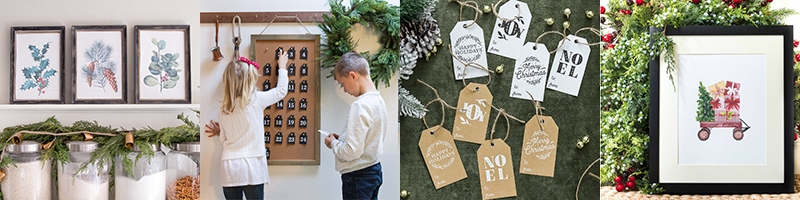
Christmas Botanicals by Ella Claire | Little House Advent Calendar by Zevy Joy | Christmas Gift Tags by So Much Better with Age | Home for the Holidays by On Sutton Place
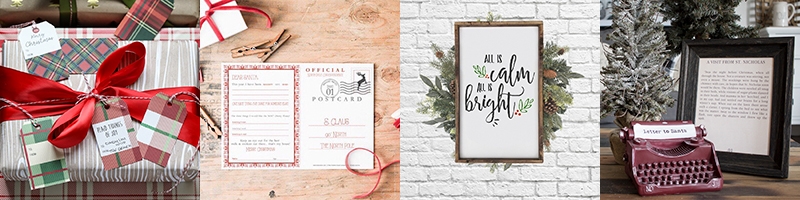
Plaid Gift Tags by Inspired by Charm | Letter to Santa Postcard by Nina Hendrick | All is Calm by Lolly Jane | Twas the Night Before Christmas Book Page Art by Home Made Lovely
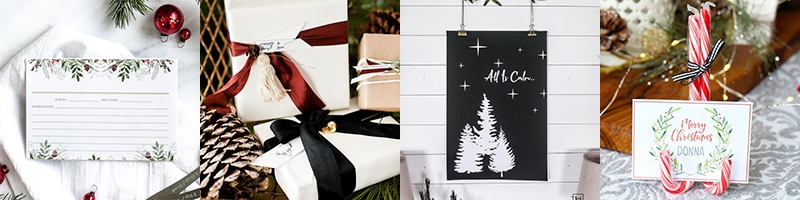
Christmas Greens Recipe Card by anderson + grant | Farm Animal Gift Tags by Boxwood Avenue | Black and White All Is Calm Christmas Art by Taryn Whiteaker | Christmas Watercolor Place Cards by Clean and Scentsible
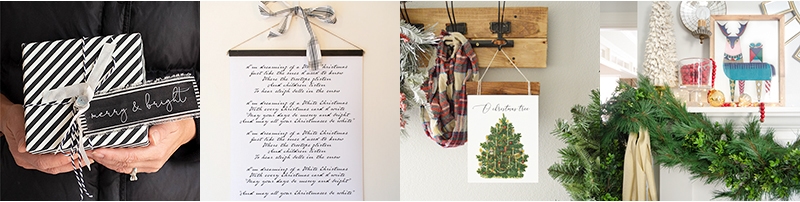
Merry and Bright Holiday Gift Tags by Happy Happy Nester | DIY White Christmas Wall Hanging by Finding Silver Pennies | O Christmas Tree by My Someday in May | Reindeer Print by The Chronicles of Home
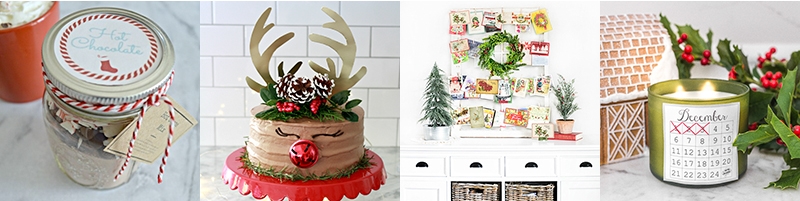
Peppermint Hot Cocoa Gift Jar Labels by My Uncommon Slice of Suburbia | Reindeer Antlers Cake by Nest of Posies | Vintage Inspired Christmas Postcards by Live Laugh Rowe | Advent Calendar Candle Label by Blesser House
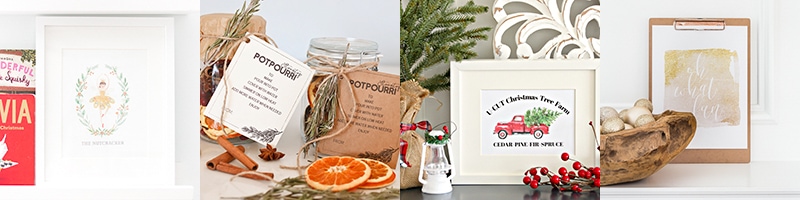
Nutcracker Set by Making Home Base | Stovetop Potpourri Tags by Tidbits | 5 Vintage Christmas Truck Printables by Happy Housie | Sparkly Blush Christmas Printable Set by Maison de Pax
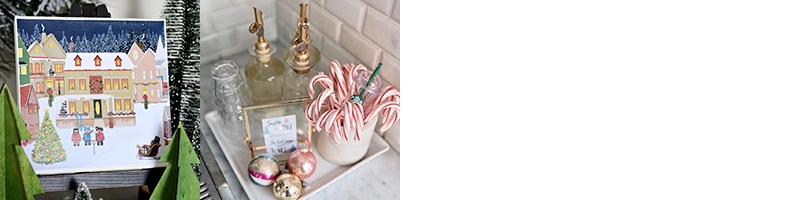
Christmas Canvas Prints by Town and Country Living | Sugar & Spice are Making the Holidays Nice by My Sweet Savannah Happy hall decking, y’all! Have you started yet? Or waiting until after Thanksgiving? I love having ours all finished before Turkey Day so that we can just relax by the glistening tree and candle light for even longer.
The post Advent Calendar Candle Label Printable appeared first on Bless'er House. Originally from Bless'er House https://ift.tt/2OCCZk0 12 of the most common decorating mistakes most people make when choosing paint colors, furniture layouts, and styling, and tips on how to avoid them.Good griefous, y’all. There are times I think about ALL of the doofus decorating mistakes I made when I first started attempting to beautify our house, and part of me wishes someone had warned me! Like yes, the colors on the little paint chips in the paint store DO look totally different than they will painted onto the walls in your dark bedroom. No, do not decorate around the piece of furniture you know you really hate. Girl, listen, stop trying to make a postage stamp rug work in a giant living room. It’s not gonna happen.
But apparently, sometimes you have to learn things the hard way. Or at least, I did! This is a post I’ve been meaning to share for so long, and since some of them came up in the Bless’er House Budget Decorating Community recently (which you can sign up to join here), I thought now was a great time to spill ’em all. Friend to friend. 12 Common Decorating Mistakes and How to Avoid Them:1. Not testing paint colors before buying. We made this mistake in our last house all because I chose a paint color from a fan deck while sitting on my parents’ living room sofa at night by lamplight (just so you know, picking paint colors in bad lighting that isn’t even in your own house is a bad idea). And after Robert and my father-in-law painted our entire downstairs in that dark, yellowy beigey shade, I knew I’d made a huge mistake. But there was no turning back. Lesson learned: Pick out a few favorite paint colors from paper swatches; get some sample pots of those colors; paint them on a piece of white foam board; tape them to your walls; and take a day or two to look at those paint colors throughout the day in all kinds of light to make your final decision. You’ll thank yourself later. If you need a leg up, here are some of my favorite go-to neutral shades.
2. Decorating with too many small accessories I used to cram 20 different little decor accents on a dresser or end table or shelf because I liked all of them individually. And I figured, well, hey it’ll all look cute together. But it ended up being a cluttery looking mess.
Lesson learned: Less is more. Vary heights and sizes of accents you use on tabletops. And follow these tips that might help. Feast your eyes on one of my very first posts… Mmmhm. Yeah. Good stuff.
3. Not having plants Before I figured this one out, I’d look at a room and think, “Something is… missing.” And I could never put my finger on it until that “ah ha” moment. Oh yeah! Life… living things. See those shelves below? Put your fingers over those 3 little plants and what does it look like? Blah. That’s what. Lesson learned: Even if you have a black thumb and have to use the artificial kind instead, plants brighten a room and make the space feel alive.
4. Having too many picture frames on tabletops Any time I see “decorating tips” articles telling me to hang art and stay away from displaying family photos, I think, “You have lost your dang mind. People live here, not robots.” But back when I filled up entire console tables with picture frames of family, I realized it was crazy overwhelming, sort of like the knick-knacky problem in decorating mistake #2. Lesson learned: Display family photos in a gallery wall, and if you’re extra particular about wanting it to look clean, simple, and modern, opt for simple black and white prints in black frames. Instant streamlined decor but still sentimental (and timeless).
5. Having exposed cables and cords When we first put up our TV in our old house, it was a tangled mess, but I didn’t really know how to resolve it, so we just lived with it for a while. Lesson learned: Pick up some cord covers, wrap them around your cords, stick them to the wall, paint them the same color as your wall, and ta da! Cords are disguised. Do you see our cords on the left side of our window seat? Cord covers, baby. They’re just barely noticeable.
6. Decorating around something you hate If I had a dollar for every time I tried to decorate around a piece of furniture I hated instead of just selling it and using the money to buy something I actually liked, I’d have quite a few bucks. Decorating around something you hate to make it work = an entire room you’ll hate along with it. See this corner? I absolutely despised this leather chair. (Also, that’s the infamous dreaded paint color from mistake #1.) I tried adding a million things to the wall behind that chair in hopes of distracting from it… and made the situation worse…
Lesson learned: You don’t have to have the money to buy a new replacement piece of furniture to swap out the piece you don’t like. Thrift stores, Facebook buy/sell/trade groups, consignment shops, yard sales, and Craigslist are packed full of potential (here are some of my best Craigslisting tips). But sometimes, you’ll even get lucky with new. This IKEA Stocksund chair cost the same amount that we sold that old leather chair for on Craigslist.
7. Not decluttering before redecorating You know those “Love It or List It” shows on HGTV? Half the time, when the homeowners are walking around talking about how much they dislike their house and how “dysfunctional” it is, most of their problems would be solved just by decluttering.
Lesson learned: Before I can fully wrap my brain around how to decorate a space, I remove everything. EVERYTHING! Sort, donate, and come up with a way to organize what you do keep, and then the pretty decor can follow. (Here is a decluttering checklist that can help.)
8. Having too much furniture In our dining room in our old house, I tried to put way too many pieces of furniture in the space because I thought there was some kind of rule that a dining room just had to have a big table, 6 bulky dining chairs, a large buffet, wall decor, accent table… I mean jeez! There was no room to move in there.
Lesson learned: Rooms crammed with furniture feel smaller. Figure out what pieces you use the most and try to scale back on the rest.
9. Using rugs that are too small One time, I stuck a 4×6 rug underneath our dining room table because hey… it fit. But the chairs didn’t and it got in the way and looked awkward. And seriously… if it just creates an obstacle every day, why have it? Lesson learned: I discovered this handy little infographic one day and hello! Light bulb moment! Generally, I use a minimum of 8×10 rugs under beds and in living rooms (9×12 for larger spaces) and at least a 6×9 under a dining table (as long as all four chair legs fit on it too).
10. Too many patterns I think I used to have a phobia of solid fabrics. Because at one point, every single rug, curtain, and pillow had some sort of print or pattern on it. And it was the busiest mess ever. Lesson learned: Stick to about three fabric patterns at a time. I like to use a vintage style rug because the print is fluid and very forgiving and combine it with a nature-inspired print, a geometric print, and a solid fabric or two that still have some sort of interesting texture.
11. Picture frames hung too high I used to hang photos way up high and level with door frames until I started flipping through magazines and realized I was doing it totally wrong. Lesson learned: Hang wall decor and art at eye-level. (And not like Shaquille O’Neal eye-level.)
12. Not using any color When I first started decorating our last house, the basic premise was beige on brown on gray on greige, and it was a total snooze-fest! (Adding in tip #3 by incorporating a couple of plants helped at first though, until I figured that out.)
Lesson learned: I still love neutrals. Our current living room is totally white at the moment. BUT the fun part about neutral walls is you can have fun with color in the accents, if you’re scared to go too permanent. I love incorporating blue and green for my color-timid self because both are widely found in nature and they don’t feel quite as shocking to the eye, if you’re shy about going too bold. Maybe eventually, your color phobic self will even find the courage to paint your kitchen cabinets a deep green.
If only I figured out all of these things before I started on this decorating journey… But then again, that’s the fun part of the adventure. We all have to start somewhere. Make mistakes, figure out what speaks to you, and keep going with what you love. The rest will follow. If you have any others you’d add, leave them in the comments! Maybe it’ll save me from other mistakes I might look back at and cringe.
The post Common Decorating Mistakes and How to Avoid Them appeared first on Bless'er House. Originally from Bless'er House https://ift.tt/2JPoWXm |